Navigation Drawer and Drawer Layout Tutorial With Example In Android Studio
In Android, Navigation Drawer is a panel that displays App’s Navigation option from the left edge of the screen. It is one of the most important and useful UI pattern introduced by the Google for developing Android app.Navigation drawer is a side menu that helps us to organise the navigation inside our app. It is a uniform way to access different pages and information inside our app. It is hidden most of the time but is revealed when we swipes from left edge of the screen or whenever we click on menu/app icon in the action bar.

Table Of Contents
We might have noticed that lot of our Android Applications introduced a sliding panel menu for navigating between major modules of our application. This kind of UI was done by using third party libraries where a ListView and swiping gestures used to achieve this type of UI. But now Android itself officially introduced sliding panel menu by introducing a newer concept called Navigation Drawer. In Navigation Drawer we combine NavigationView and DrawerLayout to achieve the desired output.
Drawer Layout In Android:
In Android, DrawerLayout acts as top level container for window content that allows for interactive “drawer” views to be pulled out from one or both vertical edges of the window. Drawer position and layout is controlled by using layout_gravity attribute on child views corresponding to which side of view we want the drawer to emerge from like left to right.

Basic Drawer Layout XML Code
For adding a Navigation Drawer, declare your UI(user interface) with a DrawerLayout object as the root(parent) view of your layout. Inside this DrawerLayout add one view that contains the main content of the screen means primary layout that displays when the drawer is hidden and other view that contains the contents for the navigation drawer.
<android.support.v4.widget.DrawerLayout
    xmlns:android="http://schemas.android.com/apk/res/android"
    android:id="@+id/drawer_layout"
    android:layout_width="match_parent"
    android:layout_height="match_parent">
    <!-- The main content view displays when the drawer is hidden -->
    <FrameLayout
        android:id="@+id/content_frame"
        android:layout_width="match_parent"
        android:layout_height="match_parent" />

    <!-- The navigation drawer -->
    <android.support.design.widget.NavigationView
  android:id="@+id/navigation"
  android:layout_width="wrap_content"
  android:layout_height="match_parent"
  android:layout_gravity="start"
  app:menu="@menu/nav_items"/>

</android.support.v4.widget.DrawerLayout>
In above code snippet DrawerLayout is the root view of our Layout in which we have other layouts and content.
FrameLayout is used to hold the page content shown through different fragments.
The NavigationView is the “real” menu of our app. The menu items are written in nav_items file.
Important Methods Of Drawer Layout
Let’s we discuss some important methods of Navigation Drawer that may be called in order to manage the Navigation Drawer.
1. closeDrawer(int gravity): This method is used to close the drawer view by animating it into view. We can close a drawer by passing END gravity to this method.
Below we show how to close the drawer view. We can close a drawer on any click or other event of view.
DrawerLayout
dLayout = (DrawerLayout) findViewById(R.id.drawer_layout);
// initiate a DrawerLayout
dLayout.closeDrawer(GravityCompat.END);
// close a Drawer
2. closeDrawers(): This method is used to close all the currently open drawer views by animating them out of view. We mainly use this method on click of any item of Navigation View.
Below we close all the currently open drawer views.
DrawerLayout
dLayout = (DrawerLayout) findViewById(R.id.drawer_layout);
// initiate a DrawerLayout
dLayout.closeDrawers();
// close all the Drawers
3. isDrawerOpen(int drawerGravity): This method is used to check the drawer view is currently open or not. It returns true if the drawer view is open otherwise it returns false.
Below we check DrawerLayout is open or not. It returns true or false value.
DrawerLayout
dLayout = (DrawerLayout)
findViewById(R.id.drawer_layout);
// initiate a DrawerLayout
Boolean
isOpen = dLayout.isDrawerOpen(GravityCompat.END);
// check DrawerLayout view is open or not
4. isDrawerVisible(int drawerGravity): This method is used to check the drawer view is currently visible on screen or not. It returns true if the drawer view is visible otherwise it returns false.
Below we check DrawerLayout is visible or not. It returns true or false value.
DrawerLayout
dLayout = (DrawerLayout) findViewById(R.id.drawer_layout);
// initiate a DrawerLayout
Boolean
isVisible = dLayout.isDrawerVisible(GravityCompat.END);
// check DrawerLayout view is visible or
not
5. openDrawer(int gravity): This method is used to open the drawer view by animating it into view. We can open a Drawer by passing START gravity to this method.
Below we show how to open a Drawer Layout view. We can open a drawer on any click or other event of view.
DrawerLayout
dLayout = (DrawerLayout)
findViewById(R.id.drawer_layout);
// initiate a DrawerLayout
dLayout.openDrawer(GravityCompat.START);
// open a Drawer
In Android, Navigation View represents a standard navigation menu for our application. The menu contents can be populated by a menu resource file.
Let’s we discuss some important methods of Navigation View that may be called in order to manage the Navigation View.
1.setNavigationItemSelectedListener(NavigationView.OnNavigationItemSelectedListener listener): This method is used to set a listener that will be notified when a menu item is selected.
Below we shows the code how to use this listener.
NavigationView navView = (NavigationView) findViewById(R.id.navigation); // initiate a Navigation View
// implement setNavigationSelectedListener event
navView.setNavigationItemSelectedListener(new NavigationView.OnNavigationItemSelectedListener() {
@Override
public boolean onNavigationItemSelected(MenuItem menuItem) {

// add code here what you need on click of items.
return false;
}
});
2. setItemBackground(Drawable itemBackground): This method is used to set the resource in the background of the menu item. In this method we pass the drawable object for setting background of menu item.
Below we set the resource in the background of the menu items.
 NavigationView navView = (NavigationView) findViewById(R.id.navigation); // initiate a Navigation View
navView.setItemBackground(getResources().getDrawable(R.drawable.background)); // set a resource in background of menu items.
3. setItemBackgroundResource(int resId): This method is used to set the resource in the background of the menu item. In this method we pass the id of the resource to set in the background of menu item.
Below we set the resource in the background of the menu items.
NavigationView navView = (NavigationView) findViewById(R.id.navigation); // initiate a Navigation View
navView.setItemBackgroundResource(R.drawable.background); // set a resource in background of menu items.
From XML: We can also set the background of menu items from our xml file in which we define NavigationView.
Below we set the resource in the background of menu items.
<android.support.design.widget.NavigationView
    android:id="@+id/navigation"
    android:layout_width="wrap_content"
    android:layout_height="match_parent"
    android:layout_gravity="start"
    app:itemBackground="@drawable/background"
    app:menu="@menu/nav_items" /><!-- background resource for menu items -->
4. getItemBackground(): This method returns the background drawable for our menu items.
Below we firstly set a resource in the background of menu items and then get the same drawable.
NavigationView navView = (NavigationView) findViewById(R.id.navigation); // initiate a Navigation View
navView.setItemBackground(getResources().getDrawable(R.drawable.background)); // set a resource in background of menu items.
Drawable backgroundDrawable=navView.getItemBackground(); // get the background drawable
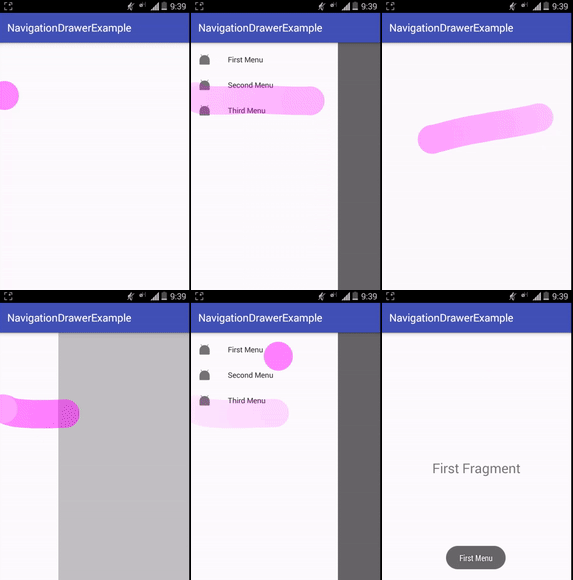
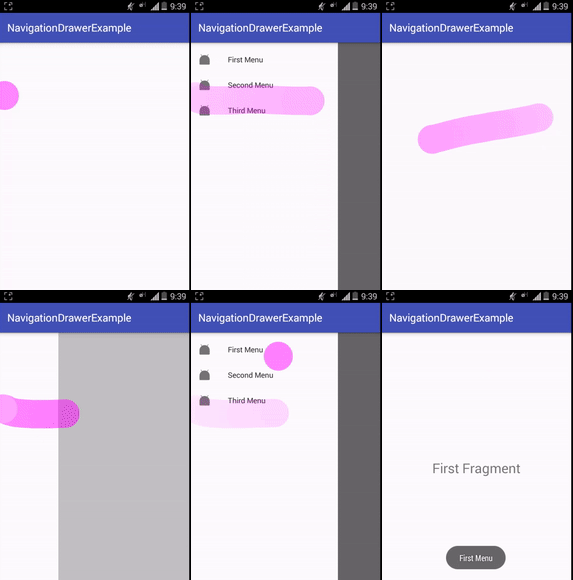
Below is the example of Navigation Drawer in which we display App’s Navigation option from left edge of the screen. In this example we use Drawer Layout and Navigation View in our XML file. Drawer Layout is the root layout in which we define a FrameLayout and a Navigation View. In Navigation View we set the items from menu file and FrameLayout is used to replace the Fragments on the click of menu items. Whenever a user click on menu item, Fragment is replaced according to menu item’s id and a toast message with menu item title is displayed on the screen. We also create three Fragments that should be replaced on click of menu items.
Below you can download code, see final output and step by step explanation of Navigation drawer example in Android Studio.
Step 1: Create a new project and name it NavigationDrawerExample.
Step 2: Open Gradle Scripts > build.gradle and add Design support library dependency.
apply plugin: ‘com.android.application’
android {
compileSdkVersion 24
buildToolsVersion "24.0.1"
defaultConfig {
applicationId "abhiandroid.navigationdrawerexample"
minSdkVersion 15
targetSdkVersion 24
versionCode 1
versionName "1.0"
}
buildTypes {
release {
minifyEnabled false
proguardFiles getDefaultProguardFile('proguard-android.txt'), 'proguard-rules.pro'
}
}
}
dependencies {
compile fileTree(dir: 'libs', include: ['*.jar'])
testCompile 'junit:junit:4.12'
compile 'com.android.support:appcompat-v7:24.1.1'
compile 'com.android.support:design:24.1.1' // design support Library
}
Step 3: Open res -> layout -> activity_main.xml (or) main.xml and add following code:
In this step we define a DrawerLayout that is the parent layout in which we define a FrameLayout and a Navigation View. In Navigation View we set the items from menu file named “nav_items” and FrameLayout is used to replace the Fragments on the click of menu items.
<?xml version="1.0" encoding="utf-8"?>
<android.support.v4.widget.DrawerLayout xmlns:android="http://schemas.android.com/apk/res/android"
    xmlns:app="http://schemas.android.com/apk/res-auto"
    xmlns:tools="http://schemas.android.com/tools"
    android:id="@+id/drawer_layout"
    android:layout_width="match_parent"
    android:layout_height="match_parent"
    android:fitsSystemWindows="true"
    tools:context=".MainActivity">
    <LinearLayout
        android:layout_width="match_parent"
        android:layout_height="match_parent"
        android:orientation="vertical">
        <!-- Let's add fragment -->
        <FrameLayout
            android:id="@+id/frame"
            android:layout_width="match_parent"
            android:layout_height="match_parent" />
    </LinearLayout>
    <!--
         Navigation view to show the menu items
    -->
    <android.support.design.widget.NavigationView
        android:id="@+id/navigation"
        android:layout_width="wrap_content"
        android:layout_height="match_parent"
        android:layout_gravity="start"
        app:menu="@menu/nav_items" />
</android.support.v4.widget.DrawerLayout>
Step 4: Open res -> menu -> nav_items.xml and add following code:
In this step we create the three menu items that should be displayed in Drawer.
<?xml version="1.0" encoding="utf-8"?>
<menu xmlns:android="http://schemas.android.com/apk/res/android">
    <group android:checkableBehavior="single">
        <!--
                Add menu items here
                Menu items with icon and Title
        -->
        <item
            android:id="@+id/first"
            android:icon="@drawable/ic_launcher"
            android:title="First Menu" />
        <item
            android:id="@+id/second"
            android:icon="@drawable/ic_launcher"
            android:title="Second Menu" />
        <item
            android:id="@+id/third"
            android:icon="@drawable/ic_launcher"
            android:title="Third Menu" />
    </group>
</menu>
Step 5: Open src -> package -> MainActivity.java
In this step we open the MainActivity and add the code for initiates the views(DrawerLayout, NavigationView and other views). After that we implement setNavigationItemSelectedListener event on NavigationView so that we can replace the Fragments according to menu item’s id and a toast message with menu item’s title is displayed on the screen. I have added comments in code to help you to understand the code easily so make you read the comments.
package abhiandroid.navigationdrawerexample;
import android.os.Bundle;
import android.support.design.widget.NavigationView;
import android.support.v4.app.Fragment;
import android.support.v4.app.FragmentTransaction;
import android.support.v4.widget.DrawerLayout;
import android.support.v7.app.AppCompatActivity;
import android.view.MenuItem;
import android.widget.Toast;
public class MainActivity extends AppCompatActivity {
DrawerLayout dLayout;
@Override
protected void onCreate(Bundle savedInstanceState) {
super.onCreate(savedInstanceState);
setContentView(R.layout.activity_main);
setNavigationDrawer(); // call method
}
private void setNavigationDrawer() {
dLayout = (DrawerLayout) findViewById(R.id.drawer_layout); // initiate a DrawerLayout
NavigationView navView = (NavigationView) findViewById(R.id.navigation); // initiate a Navigation View
// implement setNavigationItemSelectedListener event on NavigationView
navView.setNavigationItemSelectedListener(new NavigationView.OnNavigationItemSelectedListener() {
@Override
public boolean onNavigationItemSelected(MenuItem menuItem) {
Fragment frag = null; // create a Fragment Object
int itemId = menuItem.getItemId(); // get selected menu item's id
// check selected menu item's id and replace a Fragment Accordingly
if (itemId == R.id.first) {
frag = new FirstFragment();
} else if (itemId == R.id.second) {
frag = new SecondFragment();
} else if (itemId == R.id.third) {
frag = new ThirdFragment();
}
// display a toast message with menu item's title
Toast.makeText(getApplicationContext(), menuItem.getTitle(), Toast.LENGTH_SHORT).show();
if (frag != null) {
FragmentTransaction transaction = getSupportFragmentManager().beginTransaction();
transaction.replace(R.id.frame, frag); // replace a Fragment with Frame Layout
transaction.commit(); // commit the changes
dLayout.closeDrawers(); // close the all open Drawer Views
return true;
}
return false;
}
});
}
}
Step 6: Now we need 3 fragments and 3 xml layouts. So create three fragments by right click on your package folder and create classes and name them as FirstFragment, SecondFragment and ThirdFragment and add the following code respectively.
FirstFragment.class
package abhiandroid.navigationdrawerexample;
import android.os.Bundle;
import android.support.v4.app.Fragment;
import android.view.LayoutInflater;
import android.view.View;
import android.view.ViewGroup;
public class FirstFragment extends Fragment {
@Override
public View onCreateView(LayoutInflater inflater, ViewGroup container,
Bundle savedInstanceState) {
// Inflate the layout for this fragment
return inflater.inflate(R.layout.fragment_first, container, false);
}
}
SecondFragment.class
package abhiandroid.navigationdrawerexample;
import android.os.Bundle;
import android.support.v4.app.Fragment;
import android.view.LayoutInflater;
import android.view.View;
import android.view.ViewGroup;
public class SecondFragment extends Fragment {
@Override
public View onCreateView(LayoutInflater inflater, ViewGroup container,
Bundle savedInstanceState) {
// Inflate the layout for this fragment
return inflater.inflate(R.layout.fragment_second, container, false);
}
}
ThirdFrament.class
package abhiandroid.navigationdrawerexample;
import android.os.Bundle;
import android.support.v4.app.Fragment;
import android.view.LayoutInflater;
import android.view.View;
import android.view.ViewGroup;
public class ThirdFragment extends Fragment {
@Override
public View onCreateView(LayoutInflater inflater, ViewGroup container,
Bundle savedInstanceState) {
// Inflate the layout for this fragment
return inflater.inflate(R.layout.fragment_third, container, false);
}
}
Step 7: Now create 3 xml layouts by right clicking on res/layout -> New -> Layout Resource File and name them as fragment_first, fragment_ second and fragment_third and add the following code in respective files.
Here we will design the basic simple UI by using TextView in all xml’s.
fragment_first.xml
<FrameLayout xmlns:android="http://schemas.android.com/apk/res/android"
    xmlns:tools="http://schemas.android.com/tools"
    android:layout_width="match_parent"
    android:layout_height="match_parent"
    tools:context="abhiandroid.navigationdrawerexample.FirstFragment">
    <TextView
        android:layout_width="match_parent"
        android:layout_height="match_parent"
        android:gravity="center"
        android:text="First Fragment"
        android:textSize="25sp" />
</FrameLayout>
fragment_second.xml
<FrameLayout xmlns:android="http://schemas.android.com/apk/res/android"
    xmlns:tools="http://schemas.android.com/tools"
    android:layout_width="match_parent"
    android:layout_height="match_parent"
    tools:context="abhiandroid.navigationdrawerexample.SecondFragment">
    <TextView
        android:layout_width="match_parent"
        android:layout_height="match_parent"
        android:gravity="center"
        android:text="Second Fragment"
        android:textSize="25sp" />
</FrameLayout>
fragment_third.xml
<FrameLayout xmlns:android="http://schemas.android.com/apk/res/android"
    xmlns:tools="http://schemas.android.com/tools"
    android:layout_width="match_parent"
    android:layout_height="match_parent"
    tools:context="abhiandroid.navigationdrawerexample.ThirdFragment">
    <TextView
        android:layout_width="match_parent"
        android:layout_height="match_parent"
        android:gravity="center"
        android:text="Third Fragment"
        android:textSize="25sp" />
</FrameLayout>
Output:
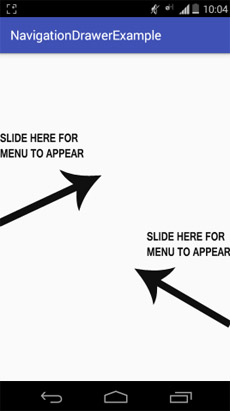
Now run the App and slide screen from left to right and you will see Menu option. On sliding right to left it will close back.
4 thoughts on “Navigation Drawer and Drawer Layout Tutorial With Example In Android Studio”
Premium Project Source Code:
- Food Ordering Android App Project Source Code
- Ecommerce Store Android App Project Source Code
- Convert Website Into Android App Project Source Code
- Quiz Game Android App Project Source Code
- Radio Streaming Android App Source Code
- City Guide Android App Project Source Code
- QR Barcode Android App Project Source Code

Why fragment needed
Because we wanted show multiple activities in example of Navigation Drawer. Please read http://abhiandroid.com/ui/fragment
nice tutorial
upload tutorial on advance topic like how to parse data using model like making pojo class ,how to use gson library,picassa,
fresco,firebase push notaifaction ,google map,payment integration,how to use github,.
your tutorial is good but these contents are already avilable in many other website like javatpoint,tutorialspoint,or so many
so make tutorial on advance android