WebView Android App: Convert Website Into App Tutorial In Android Studio
Have you ever tried converting any website into Android App? If not then let me tell you it is very easy and you will need to use WebView for doing that.
You just need the follow the tutorial step by step and application will be ready to go. An element used for that is Webview, add this element to your XML(layout) file or you can also add it in java class.
Also for the good reader we have added Bonus Tip at the end of tutorial to improve look of your WebView App.
[cp_modal id=”cp_id_b0a5f”] [/cp_modal]

Step 1: The first step is to take a responsive website that you want to convert in android app important point to note is that it should be a responsive(mobile friendly) website. Here we are using our own Abhiandroid.com to convert into android application using WebView which is Mobile responsive site.
Step 2: Create a new project in Android Studio and name it WebViewApp.
Step 3: Open res -> layout -> activity_main.xml (or) main.xml, create the application interface and add webview element to it.
<?xml version="1.0" encoding="utf-8"?>
<RelativeLayout xmlns:android="http://schemas.android.com/apk/res/android"
    xmlns:tools="http://schemas.android.com/tools"
    android:id="@+id/activity_main"
    android:layout_width="match_parent"
    android:layout_height="match_parent"
    android:paddingBottom="@dimen/activity_vertical_margin"
    android:paddingLeft="@dimen/activity_horizontal_margin"
   android:paddingRight="@dimen/activity_horizontal_margin"
    android:paddingTop="@dimen/activity_vertical_margin"
    tools:context="com.example.webviewapp.MainActivity">

 <WebView
        android:id="@+id/webview"
        android:layout_width="match_parent"
        android:layout_height="match_parent" />
</RelativeLayout>
Step 4: Open src -> package -> MainActivity.java. Here firstly declare a webview variable, make JavaScript enable and load the URL of the website. See the whole code below.
Important Note: You can replace our url in below code with any other url you want to convert it into Android App.
package com.example.webviewapp;

import android.support.v7.app.AppCompatActivity;
import android.os.Bundle;
        import android.webkit.WebSettings;
        import android.webkit.WebView;
        import android.webkit.WebViewClient;

public class MainActivity extends AppCompatActivity {
    private WebView mywebView;
    @Override
    protected void onCreate(Bundle savedInstanceState) {
        super.onCreate(savedInstanceState);
        setContentView(R.layout.activity_main);
        mywebView = (WebView) findViewById(R.id.webview);
        WebSettings webSettings= mywebView.getSettings();
        webSettings.setJavaScriptEnabled(true);
        mywebView.loadUrl("https://abhiandroid.com/");
    }
}
Step 5: Open AndroidManifest.xml file and add internet permission to it just after the package name. It is required because the App will load data directly from the website.
<uses-permission android:name="android.permission.INTERNET"></uses-permission>

Step 6: After adding the permissions the application is complete but when you run you will find that it will open the links in browser not in application itself. Solution for this is add this line of code in your MainActivity.java class.
mywebView.setWebViewClient(new WebViewClient());
Step 7: Now to add back buttons to the application to need to add following code to your MainActivity.java class.
    public void onBackPressed() {
        if(mywebView.canGoBack())
        {
            mywebView.goBack();
        }

        else{
            super.onBackPressed();
        }
    }
Step 8: Further if you want to remove the additional padding in the app, open activity_main.xml and in the layouts remove the padding(bottom, top, right, left). Here’s the final code.
activity_main.xml
<?xml version="1.0" encoding="utf-8"?>
<RelativeLayout xmlns:android="http://schemas.android.com/apk/res/android"
    xmlns:tools="http://schemas.android.com/tools"
    android:id="@+id/activity_main"
    android:layout_width="match_parent"
    android:layout_height="match_parent"
    tools:context="com.example.webviewapp.MainActivity">

// WebView Element
    <WebView
        android:id="@+id/webview"
        android:layout_width="match_parent"
        android:layout_height="match_parent" />
</RelativeLayout>
MainActivity.java complete code:
package com.example.webviewapp;

import android.support.v7.app.AppCompatActivity;
import android.os.Bundle;
import android.webkit.WebSettings;
import android.webkit.WebView;
import android.webkit.WebViewClient;

public class MainActivity extends AppCompatActivity {
    private WebView mywebView;
    @Override
    protected void onCreate(Bundle savedInstanceState) {
        super.onCreate(savedInstanceState);
        setContentView(R.layout.activity_main);
        mywebView = (WebView) findViewById(R.id.webview);
        WebSettings webSettings= mywebView.getSettings();
        webSettings.setJavaScriptEnabled(true);
        mywebView.loadUrl("https://abhiandroid.com/");
        // Line of Code for opening links in app
        mywebView.setWebViewClient(new WebViewClient());
    }

//Code For Back Button
@Override
    public void onBackPressed() {
        if(mywebView.canGoBack())
        {
            mywebView.goBack();
        }

        else
        {
            super.onBackPressed();
        }
    }
}
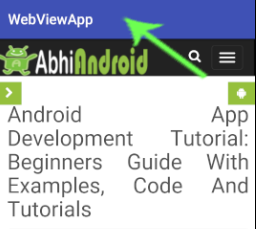
Bonus Tip For WebView App: In addition if you want to remove the default action bar, see in image the blue top header. You just need to make a little change in styles.xml file.

app -> res -> values -> styles.xml
Just change theme as NoActionBar. Below code will do
<style name="AppTheme" parent="Theme.AppCompat.Light.NoActionBar">
Output:
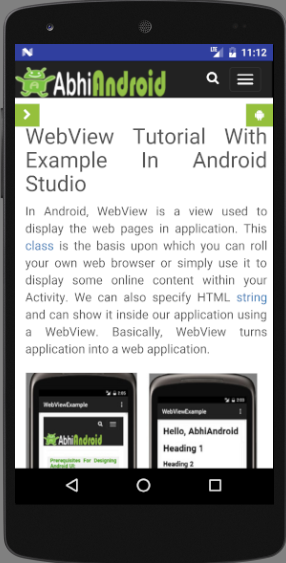
Now run the App and you will see WebView App of AbhiAndroid website. You can simply replace the url with any website url you want to convert into Android App.

Thanks for your great tutorial.
I have been able to use webview in my app after reading your article.
I’m blind for anything about building an App. I’ve just downloaded Android Studio because I want to try to convert my website to an App. From so many tutorials on “how to convert a website to an App” in the internet, your tutorial is the one it works for me. Thank you very much. Guessing here and there, I finally can change the Title from “WebViewApp” (the most top blue bar) to something else. Would you please tell me how do I center the text of that Title “WebViewApp” ? Thank you very much once again.
You will need to design custom ActionBar/Toolbar for that.
I have created Ultimate WebView Android App. It has features you want and 20+ more features:
-Material Design
-Admob (Banner & interstitial)
-FCM push notification(Firebase cloud messaging)
-Progressbar
-Splash screen
-Customized Navigation Menu
-Share Dialog
-Support video (youtube, Vimeo etc)
-Intent to open sms, phone, emails or Map
-Open link internally, external browser or in other external App
-Map search
-Map address
-Download Manager
-Rate my app prompt
-Google Firebase analytics tracking
-Pull to refresh
-Local HTML pages
-Runtime permission
-Actionbar with unlimited color theme possibility
-Support javascript, HTML5 and other standard web technology
-Custom Offline handling
-Download Manager
-Supports from Android 4.1 (Jelly Bean) and newer.
-Confirmation dialog when user tries to exit the App
-Error Handling
-Multiple Language Support
-Responsive Design support in Mobile and Tablet
-Handle portrait and landscape change correctly
You can get the source here: http://abhiandroid.com/sourcecode/webview/
and sir how to add admob adds unite id
i have created an android app of a website i.e in a webview form but my app is not able to download files from the links given in the wesite.
You will need to code separately for Download Manager.
I have the same issue here. On my website there are several links to pdf files but none of them opens (download) after converting site to app. Do you have a reference to share with me?
Pdf doesn’t load inside WebView. You can add download manager to download it when somebody click on it. I have added code for that in Ultimate WebView App which you can order here – http://abhiandroid.com/sourcecode/webview/
Thankyou ..so much for the codes it helped me a lot.
super easy tutorial, but i have a problem
how to open external link that dont have my website url in it in external browser.
thanks in advance
You will need to code intent forcing with a tag like target=”blank” to open in external browser
is it not target=”_blank”?
I have converted in app using this code but touch functionality is not working smoothly. Have to wait for long time to make function work. While I have tested mobile version of website it’s working smoothly in external browser. Any solution for this?
What type of function you want to work? Because most of the time we have to code separately in the code to make the function work. For example to make download work, you need to add download manager.
i have a problem with this the “website not available”
Make sure you are using complete url with http:// or https://
hi, while running the app my build is successful but my web site is not open in emulator
any answer accept…
What technology does your website is built in? WebView doesn’t support all.
thanks or the outstanding tutorial but
sir i am facing some problem like some category and pages are not clickable/open
hi
how to import your source code into studio , i downloaded from box website
please advice ?
After downloading please first extract the zip file of the code. Then in Android Studio open an existing project and locate to the location of our project which you downloaded.
Stuck!!!!! I can not find package while trying to Open src -> package -> MainActivity.java
hello sir I am facing a problem
I am using android studio 3.0
mywebView = (WebView) findViewById(R.id.webview);
webview showing in red color
this line showing error
Please tell me how to remove error
Please download complete from article and it will work.
Im getting below error when i share my link to social network
The select tag of the file selection does not work
What do you advise?
there is an error on my mainactivity.java
this codes.
“WebView mwebview = (WebView)findViewById(R.id.webView);
WebSettings mywebSettings = mwebview.getSettings();
mywebSettings.setJavaScriptEnabled(true);
mwebview.loadUrl(“http://www.cssoevoting.com/”);”
please help me. thank you
Hi sir…,
I converted website into Android app, Everything is working properly except call-to-us icon,
I used Call us, when I open the website in mobile call-to-us icon is working, When I open the app Call-to-us icon is not working, It will showing web page is not available. What to do?
great tutorial. working perfectly. how to add notification in webview from website, if website is update. thanks
I have successfully converted my bootstrap website into android app, following your guidelines. But, when I try to download any file (links are coded in my website) using the App I couldn’t, whereas in the website I can download the files. Please help.
You will need to add download manager in code because by default WebView doesn’t support it.
thank you very much for your efforts but i do steps in article exactly but it does not work
please help
i have downloaded code too to test but studio says “project gradle is not supported”
great efforts to deliver knowledge…keep it up…..please upload source code of some projects…i want to buy .
How to use Drag and drop option. File of html does not work. Is there any option to upload files or photos
Thank you for this helpfull information.
In step 6 , we have to write a code to MainActivity.java class .
where is MainActivity.java class located ? and at which place we write the code ?
Thank you.
hii sir, how to create app icon and splash screen in web view
i want to display multiple pdfs in same activity loading from url
i tried but i doesnt so would u help me plzz
Thank you for your tutorial, very helpfull.
But how to reading QR code using webview ?
My QR code reader doesn’t work on webview.
Thank You
Thank you very much for this turtorial! However I have a problem. When I rotate the screen on my mobile phone the app redirects me to the index page. Is it possible to fix this problem?
I am a new android developer but i am having issues with file upload in my webview
app, pls help me
This Very Good Tutorial in Mobile Apps 🙂 Thank you.
I have source code of android and ios app which was created by third party for my website. Now the problem is that push notifications and admob ad does not appears in app.
I found that developer has not added id’s for my respective demand
1. push notifications either onesignle or Firebase my website is WordPress site and uses free onesignle plugin
2. Put my admob pub id benner ad , Inerstial ad or native ad,
Every thing may available in code, only need to put id’s like.. For onesignle push notifications app id to put in code and for admob my banner, intertial, native I’d..
You have to add push notifications ID and Admob id in souce code and provide that souce and with apk for Android and IOS
I m ready to pay nominal among for that
All thanks to Abhia, your such a great guy, thanks for the tutorials, so helpful
I followed every step very carefully but when I go to build the apk I get many errors. I use the Android Studio 4.0
i have converted the website to android app but my payumoney page is not open when i click the payment link. is m doing something wrong. please help me
this is working in my app
thanks
my style.xml file is not comming by default
and I want to make a web view app for the e-commerce website
When you choose new project in Android Studio you are presented with several options to choose from and I don;t think it’s covered here?