How To Create HTML App Using ListView, WebView And Intent In Android Studio
Do you know you can use HTML in your android app and it’s too easy to use!
Let’s discuss how to create a android app using HTML. In this HTML App tutorial we are going use of multiple Android UI components to design and step by step developing a Basic application in Android Studio.
Topics Used For Creating Calculator App – Before following the below steps it is recommended you check out TextView, ImageView, WebView, Intent, ListView and Linear Layout topics. Also go through JAVA OOPS concept once.
How To Create HTML App Using ListView, WebView And Intent In Android Studio:
Below you can download code, see final output and step by step explanation of HTML App in Android Studio.
Step 1: Firstly get the Android Studio downloaded in your system, then open it.
Step 2: Create a new project and name it HtmlApp.
Step 3: Open res -> layout -> activity_main.xml (or) main.xml. Here we are going to create the application interface like add layouts, ListView.
<?xml version="1.0" encoding="utf-8"?>
<LinearLayout xmlns:android="http://schemas.android.com/apk/res/android"
    xmlns:tools="http://schemas.android.com/tools"
    android:id="@+id/activity_main"
    android:layout_width="match_parent"
    android:layout_height="match_parent"
    android:paddingBottom="@dimen/activity_vertical_margin"
    android:paddingLeft="@dimen/activity_horizontal_margin"
    android:paddingRight="@dimen/activity_horizontal_margin"
    android:paddingTop="@dimen/activity_vertical_margin"
    tools:context="com.example.htmlapp.MainActivity">

    <ListView
        android:id="@+id/listview"
        android:layout_width="match_parent"
        android:layout_height="match_parent"
        android:layout_alignParentLeft="true"
        android:layout_alignParentStart="true"
        android:layout_alignParentTop="true"
        android:dividerHeight="7dp"></ListView>
</LinearLayout>
Step 4: Create a new activity name Listview, in this add a textview and imageview and below is the code of activity_listview.xml. In this xml we design the UI for particular item in listview which involve image and text.
<?xml version="1.0" encoding="utf-8"?>
<LinearLayout xmlns:android="http://schemas.android.com/apk/res/android"
    xmlns:app="http://schemas.android.com/apk/res-auto"
    xmlns:tools="http://schemas.android.com/tools"
    android:id="@+id/activity_listview"
    android:layout_width="match_parent"
    android:layout_height="match_parent"
    android:paddingBottom="@dimen/activity_vertical_margin"
    android:paddingLeft="@dimen/activity_horizontal_margin"
    android:paddingRight="@dimen/activity_horizontal_margin"
    android:paddingTop="@dimen/activity_vertical_margin"
    tools:context="com.example.htmlapp.Listview">

    <ImageView
        android:id="@+id/imageView"
        android:layout_width="72dp"
        android:layout_height="48dp"
        app:srcCompat="@drawable/pic" />

    <TextView
        android:id="@+id/textView"
        android:layout_width="wrap_content"
        android:layout_height="wrap_content"
        android:layout_marginLeft="20dp"
        android:layout_marginRight="2dp"
        android:layout_weight="0.84"
        android:text="TextView"
        android:textSize="25sp"
        android:textStyle="bold|italic" />
</LinearLayout>
Step 5: Open src -> package -> MainActivity.java. The interface part of the application is over, let’s focus on adding functionality to the application.
In this set a setOnItemClickListener over the listview and further intent is used to move to next activities. See the code:
Important Note: Make sure images are stored in drawable folder present inside res folder with correct naming.
package com.example.htmlapp;

import android.content.Intent;
import android.support.v7.app.AppCompatActivity;
import android.os.Bundle;
import android.view.View;
import android.widget.AdapterView;
import android.widget.ListView;

public class MainActivity extends AppCompatActivity {

    ListView list;
    String data[]={"About","Quotes ","Images"};
    int pic[]={R.drawable.pic,R.drawable.pic1,R.drawable.pic2};
    @Override
    protected void onCreate(Bundle savedInstanceState) {
        super.onCreate(savedInstanceState);
        setContentView(R.layout.activity_main);
        list = (ListView) findViewById(R.id.listview);
        CustomAdapter  customAdapter = new  CustomAdapter (getApplicationContext(),data,pic);
        list.setAdapter(customAdapter);
        list.setOnItemClickListener(new AdapterView.OnItemClickListener() {
            @Override
            public void onItemClick(AdapterView<?> parent, View view, int position, long id) {
               switch (position)
               {
                   case 0:
                       Intent intent00 = new  Intent(getBaseContext(), AboutActivity.class);
                       startActivity(intent00);
                       break;
                   case 1:
                       Intent intent01 = new  Intent(getBaseContext(), QuotesActivity.class);
                       startActivity(intent01);
                       break;
                   case 2:
                       Intent intent10 = new  Intent(getBaseContext(), ImagesActivity.class);
                       startActivity(intent10);
                       break;
               }
            }
        });
    }
}
Step 6: Create a class CustomAdapter.java. Custom Adapter which will extends BaseAdapter. Below is the code of CustomAdapter.java.
If you are new Adapter please read BaseAdapter.
package com.example.htmlapp;

import android.content.Context;
import android.view.LayoutInflater;
import android.view.View;
import android.view.ViewGroup;
import android.widget.BaseAdapter;
import android.widget.ImageView;
import android.widget.TextView;

public class CustomAdapter extends BaseAdapter {
    Context context;
    String data[];
    int pic[];
    LayoutInflater inflter;

    public CustomAdapter(Context applicationContext, String[] data, int[] pic) {
        this.data = data;
        this.context = context;
        this.pic = pic;
        inflter = (LayoutInflater.from(applicationContext));
    }

    @Override
    public int getCount() {
        return data.length;
    }

    @Override
    public Object getItem(int position) {
        return null;
    }

    @Override
    public long getItemId(int position) {
        return 0;
    }

    @Override
    public View getView(int i, View view, ViewGroup viewGroup) {
        view = inflter.inflate(R.layout.activity_listview, null);
        TextView textView = (TextView) view.findViewById(R.id.textView);
        ImageView imageView = (ImageView) view.findViewById(R.id.imageView);
        textView.setText(data[i]);
        imageView.setImageResource(pic[i]);
        return view;
    }
}
Step 7: Now add three activities to the app, in current example there are further three activities(AboutActivity, QueryActivity, ImagesActivity) linked via onclicked listener to the listview. After adding the activities add webview, textview, imageview etc in xml files. See the code of the activities.
Code of activity_about.xml :
<?xml version="1.0" encoding="utf-8"?>
<RelativeLayout xmlns:android="http://schemas.android.com/apk/res/android"
    xmlns:tools="http://schemas.android.com/tools"
    android:id="@+id/activity_html"
    android:layout_width="match_parent"
    android:layout_height="match_parent"
    android:paddingBottom="@dimen/activity_vertical_margin"
    android:paddingLeft="@dimen/activity_horizontal_margin"
    android:paddingRight="@dimen/activity_horizontal_margin"
    android:paddingTop="@dimen/activity_vertical_margin"
    tools:context="com.example.htmlapp.AboutActivity">

    <WebView
        android:layout_width="match_parent"
        android:layout_height="match_parent"
        android:layout_alignParentTop="true"
        android:layout_alignParentLeft="true"
        android:layout_alignParentStart="true"
        android:id="@+id/webview00" />
</RelativeLayout>
Code of activity_quotes.xml :
<?xml version="1.0" encoding="utf-8"?>
<RelativeLayout xmlns:android="http://schemas.android.com/apk/res/android"
    xmlns:tools="http://schemas.android.com/tools"
    android:id="@+id/activity_quotes"
    android:layout_width="match_parent"
    android:layout_height="match_parent"
    android:paddingBottom="@dimen/activity_vertical_margin"
    android:paddingLeft="@dimen/activity_horizontal_margin"
    android:paddingRight="@dimen/activity_horizontal_margin"
    android:paddingTop="@dimen/activity_vertical_margin"
    tools:context="com.example.htmlapp.QuotesActivity">

    <WebView
        android:layout_width="match_parent"
        android:layout_height="match_parent"
        android:layout_alignParentRight="true"
        android:layout_alignParentEnd="true"
        android:layout_alignParentTop="true"
        android:id="@+id/webview01"/>
</RelativeLayout>
Code of activity_images.xml :
<?xml version="1.0" encoding="utf-8"?>
<RelativeLayout xmlns:android="http://schemas.android.com/apk/res/android"
    xmlns:app="http://schemas.android.com/apk/res-auto"
    xmlns:tools="http://schemas.android.com/tools"
    android:id="@+id/activity_images"
    android:layout_width="match_parent"
    android:layout_height="match_parent"
    android:paddingBottom="@dimen/activity_vertical_margin"
    android:paddingLeft="@dimen/activity_horizontal_margin"
    android:paddingRight="@dimen/activity_horizontal_margin"
    android:paddingTop="@dimen/activity_vertical_margin"
    tools:context="com.example.htmlapp.ImagesActivity">

    <ImageView
        android:id="@+id/imageView2"
        android:layout_width="wrap_content"
        android:layout_height="wrap_content"
        android:layout_alignParentLeft="true"
        android:layout_alignParentStart="true"
        android:layout_marginTop="250dp"
        android:paddingTop="2dp"
        app:srcCompat="@drawable/quote11" />

    <ImageView
        android:id="@+id/imageView1"
        android:layout_width="wrap_content"
        android:layout_height="wrap_content"
        android:layout_alignParentEnd="true"
        android:layout_alignParentLeft="true"
        android:layout_alignParentRight="true"
        android:layout_alignParentStart="true"
        android:layout_marginBottom="250dp"
        android:layout_marginTop="2dp"
        android:paddingTop="0dp"
        app:srcCompat="@drawable/quote00" />

    <TextView
        android:id="@+id/textView1"
        android:layout_width="match_parent"
        android:layout_height="wrap_content"
        android:layout_alignParentLeft="true"
        android:layout_alignParentStart="true"
        android:layout_alignParentTop="true"
        android:layout_marginLeft="34dp"
        android:layout_marginStart="34dp"
        android:gravity="center"
        android:text="IMAGES"
        android:textColor="@android:color/background_dark"
        android:textSize="25sp"
        android:textStyle="bold" />

</RelativeLayout>
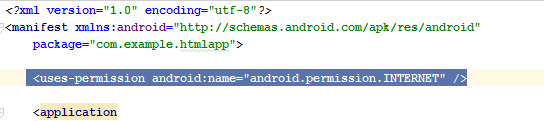
Step 8: Open AndroidManifest.xml file and add internet permission to it just after the package name. It is required because the App will load HTML data.
<uses-permission android:name="android.permission.INTERNET"></uses-permission>
Step 9: Now we will add functionality to these activities.
In this we will add the code in HTML format and webview is used for that. See the code below:
Code of AboutActivity.java
package com.example.htmlapp;

import android.os.Bundle;
import android.support.v7.app.AppCompatActivity;
import android.webkit.WebView;

public class AboutActivity extends AppCompatActivity {
    WebView webView;

    @Override
    protected void onCreate(Bundle savedInstanceState) {
        super.onCreate(savedInstanceState);
        setContentView(R.layout.activity_about);
        webView = (WebView) findViewById(R.id.webview00);
        String about = "<html> <body> <h2> Jayalalithaa Jayaram </h2> <p> (24 February 1948 – 5 December 2016)" +
                " was an Indian actress and politician who served five terms as the Chief Minister of Tamil Nadu," +
                " for over fourteen years between 1991 and 2016.</p> </body> </html>";
        webView.loadData(about, "text/html", "UTF-8");
    }
}
Code of QuoteActivity.java
package com.example.htmlapp;

import android.support.v7.app.AppCompatActivity;
import android.os.Bundle;
import android.webkit.WebView;

public class QuotesActivity extends AppCompatActivity {
    WebView webView;
    @Override
    protected void onCreate(Bundle savedInstanceState) {
        super.onCreate(savedInstanceState);
        setContentView(R.layout.activity_quotes);
        webView = (WebView) findViewById(R.id.webview01);
        String about= "<html> <body> <h2> Jayalalithaa Jayaram Quotes </h2> </br>" +
                " <ul> <li><b> Cops Should Fulfill the Expectations and needs of the Public </b></li> </br> " +
                "<li> <b> Challenges set the standard for the rise of talent. <b> </li> </ul>"+
                "</body> </html>";
        webView.loadData(about,"text/html","UTF-8");
    }
}
Output:
Now run the App and you will see the Listview listing items and further click it over to see app functionality. You can customize the App based on your requirement.
Are you sure that the password is abhiandroid
typo mistake. I just updated it. Please try now.
Images JAVA file is missing
it is present. If you still face problem please download code.
how to get key
Key is abhiandroid
how to get the list of selected item ids from a spinner
How can i customize it with html multiple choice quiz