PercentFrameLayout Tutorial With Example In Android Studio
In Android PercentFrameLayout is a subclass of FrameLayout that supports percentage based margin and dimensions for Views(Button, TextView or any other view).
PercentFrameLayout class extends from FrameLayout class so it supports all the features, attributes of FrameLayout and it has percentage dimensions so it also supports some features of Linear Layout. In Simple words we can say that PercentFrameLayout has features of both Layouts with reduced view complexity.
Percent Support Library: Percent Support Library provides feature to set the dimensions and margins in the term of Percentage. It has two pre built Layouts- the PercentFrameLayout and PercentRelativeLayout. This library is pretty easy to use because it has same Relative Layout and Frame Layout that we are familiar with, just with some additional new features. In this article we only discuss PercentFrameLayout.
Important Note – To use PercentFrameLayout first include Percent Support Library dependency file in build.grade(Module: app).
Gradle Scripts > build.gradle (Module:App) -> inside dependencies
dependencies {
compile 'com.android.support:percent:23.3.0'
}
Table Of Contents
Need of PercentFrameLayout:
In Android there are lot of Layout’s that can be used at the time of development but at last we ends up with our main three layouts LinearLayout, RelativeLayout and FrameLayout. In many situations when we need to create complex view then we use weight property of LinearLayout to distribute view across screens. But while using weight property we must have noticed that we have to add a default container view to encapsulate our child view. We can follow this approach but it adds an additional view hierarchy in our layout’s which is of no use except holding weight sum value and child view. After the introduction of PercentFrameLayout we can put percentage dimension and margins to our view that helps us to remove the problem of existing FrameLayout.
Short Description About FrameLayout In Android:
In Android Frame Layout is one of the simplest layout used to organize view controls. It is designed to block an area on the screen. Frame Layout should be used to hold child view, because it can be difficult to display single views at a specific area on the screen without overlapping each other. You can read full FrameLayout tutorial here.
Important Note:
In PercentFrameLayout, it is not necessary to specify layout_width and layout_height attributes if we specify layout_widthPercent attribute. If in case we want the view to be able to take up more space than what percentage value permits then we can add layout_width and layout_height attributes with wrap_content value. In that case if the size of content is larger than percentage size then it will be automatically resized using wrap_content rule. If we don’t use layout_height and layout_width attribute then Android Studio shows us an error marker on element in the editor but it will be automatically ignored at runtime.
Basic PercentFrameLayout XML Code:
<?xml version="1.0" encoding="utf-8"?>
<android.support.percent.PercentFrameLayout xmlns:android="http://schemas.android.com/apk/res/android"
    android:layout_width="match_parent"
    android:layout_height="match_parent">
    <!-- Add Child View's Here... -->
</android.support.percent.PercentFrameLayout>
Attributes of PercentFrameLayout:
Now let’s we discuss some common attributes of a PercentFrameLayout that helps us to configure it in our layout (xml). It supports all the attributes of FrameLayout but here we are only discuss some additional attributes.
Important Note – Before using below code please include Percent Support Library dependency file in build.grade(Module: app).
Gradle Scripts > build.gradle (Module:App) -> inside dependencies
dependencies {
compile 'com.android.support:percent:23.3.0'
}
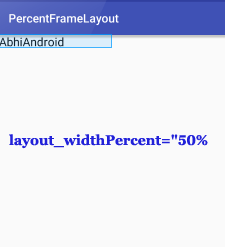
1. layout_widthPercent: This attribute is used to set the width of the view in percentage.
Below we set 50% value for the widthPercent and wrap_content value for the height of the TextView.
<?xml version="1.0" encoding="utf-8"?>
<android.support.percent.PercentFrameLayout
    xmlns:android="http://schemas.android.com/apk/res/android"
    xmlns:app="http://schemas.android.com/apk/res-auto"
    android:layout_width="match_parent"
    android:layout_height="match_parent">
    <TextView
        app:layout_widthPercent="50%"
        android:layout_height="wrap_content"
        android:textColor="#000"
        android:textSize="20sp"
        android:text="AbhiAndroid" />
</android.support.percent.PercentFrameLayout>
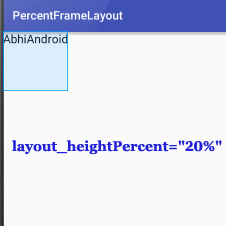
2. layout_heightPercent: This attribute is used to set the height of the view in percentage.
Below we set 20% value for the heightPercent and wrap_content value for the width of the TextView.
<?xml version="1.0" encoding="utf-8"?>
<android.support.percent.PercentFrameLayout xmlns:android="http://schemas.android.com/apk/res/android"
    xmlns:app="http://schemas.android.com/apk/res-auto"
    android:layout_width="match_parent"
    android:layout_height="match_parent">
    <TextView
        android:layout_width="wrap_content"
        android:text="AbhiAndroid"
        android:textColor="#000"
        android:textSize="20sp"
        app:layout_heightPercent="20%" />
</android.support.percent.PercentFrameLayout>
3. layout_marginPercent: This attribute is used to set the margin for view in term of percentage. This attribute set the same margin from all the sides.
Below we set wrap_content vlaue for height and width and 20% margin from all the sides of TextView.
<?xml version="1.0" encoding="utf-8"?>
<android.support.percent.PercentFrameLayout xmlns:android="http://schemas.android.com/apk/res/android"
    xmlns:app="http://schemas.android.com/apk/res-auto"
    android:layout_width="match_parent"
    android:layout_height="match_parent">
    <TextView
        android:layout_width="wrap_content"
        android:layout_height="wrap_content"
        android:text="AbhiAndroid"
        android:textColor="#000"
        android:textSize="20sp"
        app:layout_marginPercent="20%" />
</android.support.percent.PercentFrameLayout>

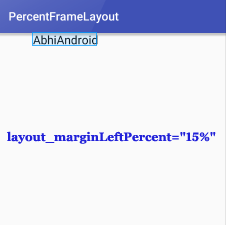
4. layout_marginLeftPercent: This attribute is used to set the percentage margin to the left side of the view.
Below we set wrap_content value for height and width and 15% margin to the left side of the TextView.
<?xml version="1.0" encoding="utf-8"?>
<android.support.percent.PercentFrameLayout xmlns:android="http://schemas.android.com/apk/res/android"
    xmlns:app="http://schemas.android.com/apk/res-auto"
    android:layout_width="match_parent"
    android:layout_height="match_parent">
    <TextView
        android:layout_width="wrap_content"
        android:layout_height="wrap_content"
        android:text="AbhiAndroid"
        android:textColor="#000"
        android:textSize="20sp"
        app:layout_marginLeftPercent="15%" />
</android.support.percent.PercentFrameLayout>
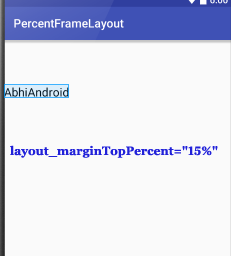
5. layout_marginTopPercent: This attribute is used to set the percentage margin to the top side of the view.
Below we set wrap_content value for height and width and 15% margin to the top side of the TextView.
<?xml version="1.0" encoding="utf-8"?>
<android.support.percent.PercentFrameLayout xmlns:android="http://schemas.android.com/apk/res/android"
    xmlns:app="http://schemas.android.com/apk/res-auto"
    android:layout_width="match_parent"
    android:layout_height="match_parent">
    <TextView
        android:layout_width="wrap_content"
        android:layout_height="wrap_content"
        android:text="AbhiAndroid"
        android:textColor="#000"
        android:textSize="20sp"
        app:layout_marginTopPercent="15%" />
</android.support.percent.PercentFrameLayout>
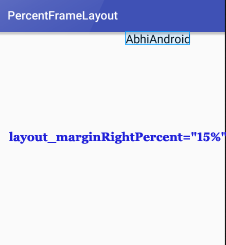
6. layout_marginRightPercent: This attribute is used to set the percentage margin to the right side of the view.
Below we set wrap_content value for height and width and 15% margin to the right side of the TextView. In this example we set right gravity of TextView so that we can easily check the use of this attribute.
<?xml version="1.0" encoding="utf-8"?>
<android.support.percent.PercentFrameLayout xmlns:android="http://schemas.android.com/apk/res/android"
    xmlns:app="http://schemas.android.com/apk/res-auto"
    android:layout_width="match_parent"
    android:layout_height="match_parent">
    <TextView
        android:layout_width="wrap_content"
        android:layout_height="wrap_content"
        android:layout_gravity="right"
        android:text="AbhiAndroid"
        android:textColor="#000"
        android:textSize="20sp"
        app:layout_marginRightPercent="15%" />
</android.support.percent.PercentFrameLayout>
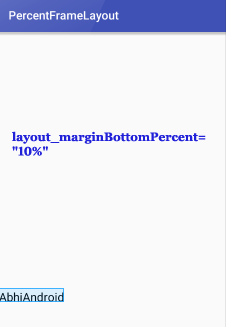
7. layout_marginBottomPercent: This attribute is used to set the percentage margin from bottom side of the view.
Below we set wrap_content value for height and width and 15% margin from the bottom side of the TextView. In this example we set bottom gravity of TextView so that we can easily check the use of this attribute.
<?xml version="1.0" encoding="utf-8"?>
<android.support.percent.PercentFrameLayout xmlns:android="http://schemas.android.com/apk/res/android"
    xmlns:app="http://schemas.android.com/apk/res-auto"
    android:layout_width="match_parent"
    android:layout_height="match_parent">
    <TextView
        android:layout_width="wrap_content"
        android:layout_height="wrap_content"
        android:layout_gravity="bottom"
        android:text="AbhiAndroid"
        android:textColor="#000"
        android:textSize="20sp"
        app:layout_marginBottomPercent="10%" />
</android.support.percent.PercentFrameLayout>
PercentFrameLayout Example In Android Studio:
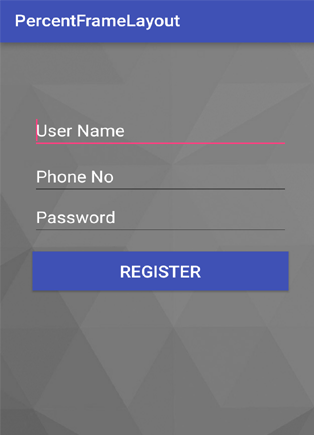
Below is the example of PercentFrameLayout in which we create a Registration Form with 3 fields User Name, Phone No and Password. In this example we take 3 EditText and 1 Register Button. And for these views we set the dimensions and margin in form of percentage. If a user click on the Register Button then a “Thank You” message with user name is displayed on the screen with the help of Toast.
 Step 1: Create A New Project And Name It PercentFrameLayout
Step 2: Open Gradle Scripts > build.gradle and add Percent Support Library dependency.
apply plugin: 'com.android.application'
android {
compileSdkVersion 24
buildToolsVersion "24.0.1"
defaultConfig {
applicationId "abhiandroid.percentframelayout"
minSdkVersion 16
targetSdkVersion 24
versionCode 1
versionName "1.0"
}
buildTypes {
release {
minifyEnabled false
proguardFiles getDefaultProguardFile('proguard-android.txt'), 'proguard-rules.pro'
}
}
}
dependencies {
compile fileTree(dir: 'libs', include: ['*.jar'])
testCompile 'junit:junit:4.12'
compile 'com.android.support:appcompat-v7:24.1.1'
compile 'com.android.support:percent:23.3.0' // Percent Support Library
}
Step 3: Open res -> layout -> activity_main.xml (or) main.xml and add following code:
In this Step we take 3 EditText’s and 1 Register Button and for these views we set the dimensions and margin in form of percentage. Note that in all the view’s i didn’t take layout_width attribute and it still works fine. Android Studio shows a error line on element but it will be automatically ignored at runtime.
<?xml version="1.0" encoding="utf-8"?>
<android.support.percent.PercentFrameLayout xmlns:android="http://schemas.android.com/apk/res/android"
    xmlns:app="http://schemas.android.com/apk/res-auto"
    android:layout_width="match_parent"
    android:layout_height="match_parent"
    android:background="@drawable/background">
<!--
    3 EditText's for user Name, Phone No and Password
-->
    <EditText
        android:id="@+id/userName"
        android:layout_height="wrap_content"
        android:layout_gravity="center_horizontal"
        android:hint="User Name"
        android:imeOptions="actionNext"
        android:singleLine="true"
        android:textColor="#fff"
        android:textColorHint="#fff"
        android:textSize="20sp"
        app:layout_marginTopPercent="15%"
        app:layout_widthPercent="80%" />
    <EditText
        android:id="@+id/phoneNo"
        android:layout_height="wrap_content"
        android:layout_gravity="center_horizontal"
        android:hint="Phone No"
        android:imeOptions="actionNext"
        android:inputType="number"
        android:singleLine="true"
        android:textColor="#fff"
        android:textColorHint="#fff"
        android:textSize="20sp"
        app:layout_marginTopPercent="25%"
        app:layout_widthPercent="80%" />
    <EditText
        android:id="@+id/password"
        android:layout_height="wrap_content"
        android:layout_gravity="center_horizontal"
        android:hint="Password"
        android:imeOptions="actionDone"
        android:singleLine="true"
        android:textColor="#fff"
        android:textColorHint="#fff"
        android:textSize="20sp"
        app:layout_marginTopPercent="34%"
        app:layout_widthPercent="80%" />
    <Button
        android:id="@+id/register"
        android:layout_height="wrap_content"
        android:layout_gravity="center"
        android:background="@color/colorPrimary"
        android:text="Register"
        android:textColor="#fff"
        android:textSize="20sp"
        app:layout_widthPercent="80%" />
</android.support.percent.PercentFrameLayout>
Step 4 : Open src -> package -> MainActivity.java
In this step we open the MainActivity and add the code for initiates the views(EditText and Button). After that we implement setOnClickListener event on Register Button so that whenever a user click on Button a thank you message appear if a user fill all the fields or an error message appear if fields are empty telling user ‘Please Fill All The Fields’ is displayed on the screen by using a Toast.
package abhiandroid.percentframelayout;
import android.os.Bundle;
import android.support.v7.app.AppCompatActivity;
import android.view.View;
import android.widget.Button;
import android.widget.EditText;
import android.widget.Toast;
public class MainActivity extends AppCompatActivity {
Button register;
EditText userName, phoneNo, password;
@Override
protected void onCreate(Bundle savedInstanceState) {
super.onCreate(savedInstanceState);
setContentView(R.layout.activity_main);
// init the View's
userName = (EditText) findViewById(R.id.userName);
phoneNo = (EditText) findViewById(R.id.phoneNo);
password = (EditText) findViewById(R.id.password);
register = (Button) findViewById(R.id.register);
// perform setOnClickListener Event on Register Button
register.setOnClickListener(new View.OnClickListener() {
@Override
public void onClick(View view) {
if (userName.getText().toString().trim().length() > 0 && phoneNo.getText().toString().trim().length() > 0 && password.getText().toString().trim().length() > 0) {
// display a thanks you message with user name
Toast.makeText(getApplicationContext(), "Thank You " + userName.getText().toString(), Toast.LENGTH_SHORT).show();
} else {
// display an error message that fill user name and password
Toast.makeText(getApplicationContext(), "Please Fill All The Fields.!!", Toast.LENGTH_SHORT).show();
}
}
});
}
}
Output:
Now run the App and you will see login form which is designed using PercentFrameLayout.
Premium Project Source Code:
- Food Ordering Android App Project Source Code
- Ecommerce Store Android App Project Source Code
- Convert Website Into Android App Project Source Code
- Quiz Game Android App Project Source Code
- Radio Streaming Android App Source Code
- City Guide Android App Project Source Code
- QR Barcode Android App Project Source Code