If you have completed developing your Android App and now wants to publish it on Playstore. Then the first step you need to take is generate signed apk in Android Studio.
In this tutorial I am going to discuss how to generate signed apk in Android Studio for publishing new App and also for updating existing App on Playstore.
Important Note: To publish App generating signed apk is compulsory as you cannot publish normal build apk file on Playstore.
Next Read: How To Publish Android App On Play Store
How To Generate Signed Apk For Publishing New App In Android Studio:
Follow the below steps:
Step 1: Go to build and click on Generate Signed Apk…

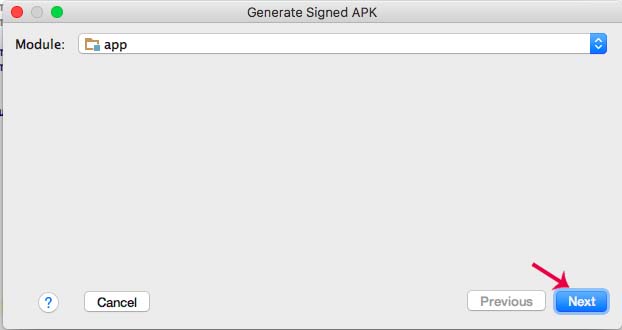
Step 2: Android Studio will now open a dialog box. Click on Next.
Step 3: Now you will need to create Keystore path. Click on Create new…

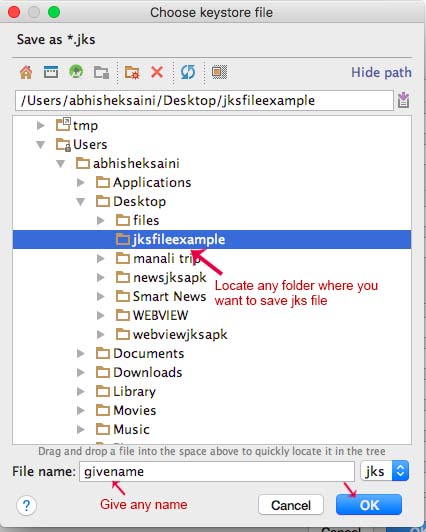
Step 4: Now locate key store path in your system where you want to save jks file of your project. Click on … to locate the path.

Step 5: After locating the path from your system. Give any name to the jks file that will be created and click ok.
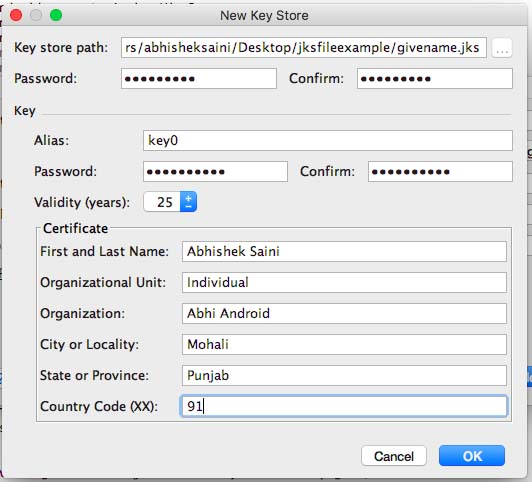
Step 6: Fill the other details and click ok. For example you can refer to the image below:
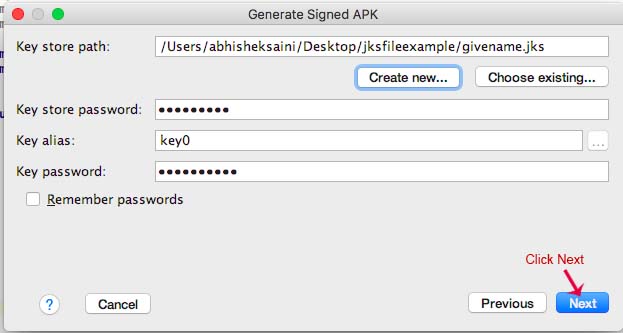
Step 7: Click next.
Step 8: Now edit the destination folder of signed apk file, choose build type and select signature versions. Finally click Finish:
Important Note: Regarding signature versions, you can consider V2 because it offers faster app install times and more protection against unauthorized alterations to APK files. If you face any problem then you can consider the traditional V1 signing scheme, which uses JAR signing.

Step 9: Now you can use this signed apk for publishing app on Playstore via your developer console.
Important Note 1: After you generate signed apk, it is very important to keep jks file safe and secure. If you lost it then you won’t be able to send future updates to your App.
Important Note 2: Make sure to keep Keystore and key password saved somewhere with you. If you lost or forget it then also you won’t be able to send new updates for your App.
How To Generate Signed apk For Updating Existing App On Playstore In Android Studio:
Follow the below steps to generate the signed apk for updating existing Android App on Playstore:
Step 1: Open the build.gradle (Module: app) file and increase the version code by 1 and change the version name according to your requirement
Step 2: Click Sync Now

Step 3: After sync is completed. Click on build and generate signed apk…
Step 4: Now click on Next
Step 5: Click on choose existing… and locate the path of jks of the App in your system.
Step 6: Enter the Key store password, key alias and key password that you created while creating jks file
Step 8: Now edit the destination folder of signed apk file, choose build type and select signature versions. Finally click Finish:
Step 9: Now you can use this signed apk for updating existing app on Playstore via your Android developer console.
Next Read: How To Publish Android App On Play Store
i have done all step, after generate signed bundle and apk, final result showing four folder – build, libs, release , src and four other file. what can i do?
very Useful
Good stuff worth the read.
Thanx sir..