Picasso Tutorial With Example In Android Studio
In Android, loading images is difficult as you have to deal with network request, image caching and image memory. Another big challenge while caching image is that image loader also need to do encoding and decoding, especially with large images because they are very memory inefficient and needs a lot of memory for a single large image. The solution to all these challenges is to use Picasso in Android.
Picasso is an image library for Android. It is created and maintained by SQUARE. Picasso hides all the complexity as it will deal with back on threading, loading images from the internet and even caching. Picasso makes memory efficient to resize and transform images. Picasso makes it quite easier for displaying images from remote locations.
Picasso Installation in Android:
Add the Picasso library in your dependencies in build.gradle file:
implementation 'com.squareup.picasso:picasso:2.5.0'
In order to load Image with Picasso you to need an Internet permission in your Android Manifest file.
<uses-permission android:name="android.permission.INTERNET" />
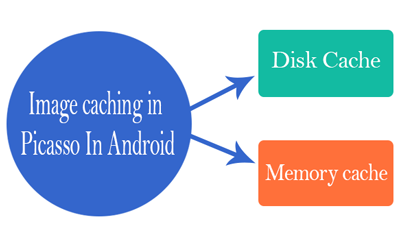
Image caching in Picasso In Android:
Caching is important to make sure that image loading is efficient and the user gets good experience. Picasso utilizes two caches
1.Disk cache
2.Memory cache.
Disk Cache: If memory cache is used in the application then the application might be disrupted by phone call or anything else and being in the background the memory cache will be destroyed. Now when the application resumes, it has to process each image again here the disk cache comes into rescue. A disk cache can be used to help to decrease loading times when images are no longer available in-memory cache and can be used to persist processed Bitmaps. Here Background thread checks the disk cache.
Memory cache: It stores and loads the resource to and from memory. It is faster to write and access, but If you use memory cache then the application could be interrupted by another task like a phone call, and while in a background application might be killed and memory cache will be destroyed and application has to process each image again once the user resumes. The Memory Cache is checked in UI thread.
If you are loading an image, Picasso load it in disk cache and memory cache. But if you are loading a lot of images Picasso will keep the most recent one in-memory cache and tries to keep all of them in the disk cache. It is important to note that when you load an image, Picasso will always try memory cache first and if it can’t find the image in memory cache, it will try to find it in the disk cache . And if the image is not available in disk cache it will have to load it from the network.
Callbacks and Targets In Picasso In Android
Picasso loads the image in two ways synchronously and Asynchronously.
.fetch() – It will asynchronously load the image into a background thread. This method only saves the image into the disk or memory cache. It’s neither going to load the image into image view nor it is going to return any Bitmap. If you want to reduce the reduce image loading times and if you know that the image is needed by you shortly after then it could be used to fill the image cache in the background.
.get() – It returns a Bitmap object and loads an image synchronously. But it will freeze the UI if you will call it from UI thread.
.into(ImageView targetImageView) – It is provided by Picasso where you can Specify your target Imageview in which the image is supposed to get displayed in.
Besides using the .into() there is another method provided by Picasso named as Targets.
Till now we have used imageView as a parameter for .into() but it can also be used with Target Interface.
The Picasso is going to load an image but this time not in Imageview but it will return the Bitmap the Target Callback
target = new Target() {
   @Override
   public void onBitmapLoaded(Bitmap bitmap, Picasso.LoadedFrom from) {
       // loadig of bitmap is successfull
   }

   @Override
   public void onBitmapFailed(Drawable errorDrawable) {
       // loading of bitmap failed
   }

   @Override
   public void onPrepareLoad(Drawable placeHolderDrawable) {


};
Picasso.with(getApplicationContext())

       .load("http://i.imgur.com/DvpvklR.png")

       .rotate(90f)

       .into(target);
If the action is successful, the callback will receive the Bitmap object and we will specify whether the image comes from a network or the cache. So whenever you need a raw Bitmap, use implementation of target or .get() to receive the image.
Image Resizing, Scaling and Fit() In Picasso In Android:
Image Resizing: It’s optimal if your API or server deliver the image in exact dimensions which are a perfect tradeoff between memory consumption bandwidth and image quality.
Unfortunately, to request the images in perfect dimensions, it’s not always in your control. If the images are not in the perfect size, you can use resize(horizontalSize, verticalSize) to change the dimensions of your image to a suitable size or size of your choice. This will help you to resize the image before loading it to actual ImageView.
Picasso .with(context)

       .load(your image source here)

       .resize(600, 200)
       .into(imageViewResizeCenterCrop);
Image Scaling: In any image manipulation resizing image can distort the image aspect ratio and make it look ugly. When I will load an image view and you always want to prevent this from happening here, Picasso gives you two choices centreCrop() and centreInside.
centreCrop(): It is a cropping technique that scales the image, so that it crops the extra and fills only the requested bounds of imageview. The entire image might not be displayed but the entire image view will be filled.
Picasso
       .with(context)
       .load(your image source here)
       .resize(600, 200) // resizes the image to these dimensions (in pixel)
       .centerCrop()
       .into(imageViewResizeCenterCrop);
centreInside(): It is a cropping technique that scales the images that the dimensions are either equal or less than the bounds of requested Image view. Here the image displayed will be complete but without filling the entire imageView.
Picasso
       .with(context)
       .load(your image source here)
       .resize(600, 200) // resizes the image to these dimensions (in pixel)
       .centerInside()
       .into(imageViewResizeCenterCrop);
Fit(): Is a method that internally measures the dimensions of target ImageView and it uses resize to reduce the size of the image to fit the dimensions of target ImageView.
You must know two things about fit(). Firstly calling fit() may delay the image request because Picasso needs time to calculate the dimensions of the target imageview. Secondly, fit() can only be used with an ImageView as the target.
The advantage of this is that without affecting the quality of the image, the image is at its lowest possible resolution. The lower resolution means to hold fewer data in the cache. So in your application memory footprint, this can drastically reduce the impact of images. So if you prefer less faster loading times but low memory footprint then fit() is great to use.
Picasso

       with(context)

       .load(image source)

       .resize(600, 200)

        .fit()

       .into(imageViewResizeCenterCrop);
Placeholders, Errors and Fading in Picasso In Android:
PlaceHolders: If you are using Picasso so depending on your user’s environment it may take a lot of time to load images from the internet. Expected behavior of the application is that in place of image load a Place holder until the actual image is loaded. Picasso makes it easy to do with the fluent interface you have to just call.
placeHolder() with a reference to a drawable and Picasso will display that as a placeholder until actual image is loaded.
Picasso
       with(context)

       .load(your image source here)

       .placeholder(R.mipmap.ic_launcher) // can also be a drawable

       .into(imageViewPlaceholder);
Application resources and drawables are guaranteed to be available and accessible. So we cannot use internet url as Place holder. Since that one would be required to be loaded as well, however for the load() Picasso accepts all kinds of values.
Error PlaceHolder: When we are loading an image in an application using Picasso and somehow your server is down. Picasso takes appropriate action by giving an option to get an error callback.
Picasso
       with(context)

       .load("Place your image source here")

       .placeholder(R.mipmap.ic_launcher) // can also be a drawable

       .error(R.mipmap.future_studio_launcher) // will be displayed if the image cannot be loaded

       .into(imageViewError);
So the image defined in load(), if somehow cannot be loaded Picasso will display.error(R.mipmap.future_studio_launcher) in place of that image and acceptable parameters for error() are already initialized drawable resources or Pointers.
Use of noFade(): It doesn’t depend whether you are displaying placeholder in place of images in application, Picasso did it automatically by fading the image into ImageView to soften the significant change in your UI. If you wish to not to show the fade effect and directly display the image without any fading then you have to call nofade() on Picasso object. This will call your image without any Fading effect on it.
Picasso
           with(context)

           .load(“place your image source”)

           .placeholder(R.mipmap.ic_launcher)// can also be a drawable

           .error(R.mipmap.future_studio_launcher)// will be displayed if the image cannot be loaded

           .noFade()

           .into(imageViewFade);
Use of noPlaceholder(): This has no impact on previously placed placeholders. Sometimes we want to display the different image into the same ImageView but when we create the next Picasso call the previous image will clear the ImageView and previously set place holder by .placeholder() will be displayed. This may not give good user experience if the user notices rapid changes between images. So better is to call .noPlaceholder() in the next Picasso call. This will keep the previous image in place until your second image gets loaded.
Priority Image Loading In Picasso In Android
Sometimes we need to prioritize the loading of the image in our application, for this Picasso provides the priority() method. This method priority() will accept one of three constants High, Medium and Low. Assigning different priority will have influence on loading behavior of images and by default, all requests have priority Medium.
Priority High: We should always know how to make correct Picasso request. Sometimes we want to give higher priority to some big image in our application and we want low priority to other images in the same screen this is possible with Picasso.
Picasso.with(context)

       .load("image source here")

       .priority(HIGH)

       .into(someImageView);
We can assign the low priority to other images in the same screen with Priority Low. By default, the images have Priority Medium.
Picasso.with(context)

           .load("image source here")

           .priority(Picasso.Priority.LOW)

           .into(someImageView);
Important Note: It is important to note that Priority doesn’t guarantee a specific order but in favor of high priority requests, it just tilt the balance towards it.
Image Rotation In Picasso:
Picasso has something built in to display images with rotation. There are two options available;
Simple Rotation: It simply rotates the image by degrees when we pass as a parameter. A value between 0 to 360 can be passed that actually makes the sense. The simple rotation call looks like rotate(float degrees)
Picasso.with(context)

       .load("image source here")

       .rotate(90f)

       .into(someImageView);
This will rotate the image by 90 degrees.
Complex Rotation: The Rotation center is at 0,0 by default call as “pivot point” Sometimes there is a requirement in application to rotate an image to specific pivot point which is not a standard center. Picasso allows doing this with rotate(float degrees, float pivotX, float pivotY).
Picasso.with(context)

       .load("image source here")

       .rotate(45f, 220f,100f)

       .into(someImageView);
Android Picasso Example in Android Studio:
Below is the example of using Picasso in Android in which we will show different features that are provided by Picasso in order to load the image in your application.
Below you can download code or read step by step example explanation:
Here we have used simple image URL that will be loaded in imageview with Picasso library. We will use Picasso provided features and on tap of few buttons in our layout, you will see image loading but in different ways.
Step 1: Create a new project in your android studio and name it as Picasso Example
Step 2: Open res -> layout -> xml (or) main.xml and add following code :
In this step, we open an XML file and add the code to display a layout in our activity. In layout we have used one image view that is going to be your target imageview, in which Image will be displayed and I have used few buttons on click of these buttons we will perform different operations that will reflect in imageview.
<LinearLayout xmlns:android="http://schemas.android.com/apk/res/android"
   xmlns:app="http://schemas.android.com/apk/res-auto"
   xmlns:tools="http://schemas.android.com/tools"
   android:layout_width="match_parent"
   android:layout_height="match_parent"
   android:orientation="vertical"
   tools:context=".MainActivity">

   <ImageView
       android:id="@+id/iv"
       android:layout_width="match_parent"
       android:layout_height="@dimen/_180sdp"
       android:layout_marginTop="@dimen/_5sdp"
       android:src="@mipmap/ic_launcher"
       />

   <LinearLayout
       android:layout_width="match_parent"
       android:layout_height="wrap_content"
       android:layout_marginTop="@dimen/_10sdp"
       android:gravity="center"
       android:orientation="horizontal">

       <Button
           android:id="@+id/resize"
           android:layout_width="0dp"
           android:layout_height="wrap_content"
           android:layout_weight="1"
           android:text="resize"
           android:textSize="@dimen/_10sdp" />

       <Button
           android:id="@+id/centrecrop"
           android:layout_width="0dp"
           android:layout_height="wrap_content"
           android:layout_weight="1"
           android:text="centrecrop"
           android:textSize="@dimen/_10sdp" />

       <Button
           android:id="@+id/centreinside"
           android:layout_width="0dp"
           android:layout_height="wrap_content"
           android:layout_weight="1"
           android:text="centreinside"
           android:textSize="@dimen/_10sdp" />


   </LinearLayout>
<LinearLayout
       android:layout_width="match_parent"
       android:layout_height="wrap_content"
       android:layout_marginTop="@dimen/_10sdp"
       android:gravity="center"
       android:orientation="horizontal">

       <Button
           android:id="@+id/fit"
           android:layout_width="0dp"
           android:layout_height="wrap_content"
           android:layout_weight="1"
           android:text="fit"
           android:textSize="@dimen/_10sdp" />

       <Button
           android:id="@+id/placeholder"
           android:layout_width="0dp"
           android:layout_height="wrap_content"
           android:layout_weight="1"
           android:text="placeholder"
           android:textSize="@dimen/_10sdp" />

       <Button
           android:id="@+id/error"
           android:layout_width="0dp"
           android:layout_height="wrap_content"
           android:layout_weight="1"
           android:text="error"
           android:textSize="@dimen/_10sdp" />


   </LinearLayout>
<LinearLayout
       android:layout_width="match_parent"
       android:layout_height="wrap_content"
       android:layout_marginTop="@dimen/_10sdp"
       android:gravity="center"
       android:orientation="horizontal">

       <Button
           android:id="@+id/fade"
           android:layout_width="0dp"
           android:layout_height="wrap_content"
           android:layout_weight="1"
           android:text="no fade"
           android:textSize="@dimen/_10sdp" />

       <Button
           android:id="@+id/callback"
           android:layout_width="0dp"
           android:layout_height="wrap_content"
           android:layout_weight="1"
           android:text="callback"
           android:textSize="@dimen/_10sdp" />

       <Button
           android:id="@+id/rotate"
           android:layout_width="0dp"
           android:layout_height="wrap_content"
           android:layout_weight="1"
           android:text="rotate"
           android:textSize="@dimen/_10sdp" />

   </LinearLayout>

   <LinearLayout
       android:layout_width="match_parent"
       android:layout_height="wrap_content"
       android:layout_marginTop="@dimen/_10sdp"
       android:orientation="horizontal">

       <Button
           android:id="@+id/complexrotation"
           android:layout_width="wrap_content"
           android:layout_height="wrap_content"
           android:text="Complex Rotation"
           android:textSize="@dimen/_10sdp" />
   </LinearLayout>
</LinearLayout>
Step 3: Open src -> package -> MainActivity.java
In this activity, we have first fetched the ids of buttons and image view and then we created a method in which we have handled every button click. Once you click any button, the image will load in image view differently on every button click. Picasso feature is used and the image will load accordingly. Below is the code of the main activity java class.
import android.support.v7.app.AppCompatActivity;
import android.os.Bundle;
import android.view.View;
import android.widget.Button;
import android.widget.ImageView;
import android.widget.Toast;

import com.squareup.picasso.Picasso;

public class MainActivity extends AppCompatActivity {
    Button resize, centrecrop, centreinside, fit, placeholder, error, fade, callback, rotate,complexrotate;
    ImageView iv;


    @Override
    protected void onCreate(Bundle savedInstanceState) {
        super.onCreate(savedInstanceState);
        setContentView(R.layout.activity_main);
        resize = findViewById(R.id.resize);
        centrecrop = findViewById(R.id.centrecrop);
        centreinside = findViewById(R.id.centreinside);
        fit = findViewById(R.id.fit);
        placeholder = findViewById(R.id.placeholder);
        error = findViewById(R.id.error);
        fade = findViewById(R.id.fade);
        callback = findViewById(R.id.callback);
        rotate = findViewById(R.id.rotate);
        iv = findViewById(R.id.iv);
        complexrotate = findViewById(R.id.complexrotation);
getData();
    }

    private void getData() {

        resize.setOnClickListener(new View.OnClickListener() {
            @Override
            public void onClick(View view) {
                Picasso.with(getApplicationContext())
                        .load("http://i.imgur.com/DvpvklR.png")
                        .resize(600, 200)// resizes the image to these dimensions (in pixel). does not respect aspect ratio
                        .into(iv);
                Toast.makeText(MainActivity.this, "Resize called ", Toast.LENGTH_SHORT).show();

            }
        });

        centrecrop.setOnClickListener(new View.OnClickListener() {
            @Override
            public void onClick(View view) {
                Picasso.with(getApplicationContext())
                        .load("http://i.imgur.com/DvpvklR.png")
                        .resize(100,100)
                        .centerCrop()
                        .into(iv);
                Toast.makeText(MainActivity.this, "Centrecrop called ", Toast.LENGTH_SHORT).show();
            }
        });
        centreinside.setOnClickListener(new View.OnClickListener() {
            @Override
            public void onClick(View view) {
                Picasso.with(getApplicationContext())
                        .load("http://i.imgur.com/DvpvklR.png")
                        .resize(100,100)
                        .centerInside()
                        .into(iv);
                Toast.makeText(MainActivity.this, "Centreinside called ", Toast.LENGTH_SHORT).show();
            }
        });
        fit.setOnClickListener(new View.OnClickListener() {
            @Override
            public void onClick(View view) {
                Picasso.

                        with(getApplicationContext())
                        .load("http://i.imgur.com/DvpvklR.png")
                        .fit()
                        .into(iv);
                Toast.makeText(MainActivity.this, "Fit called ", Toast.LENGTH_SHORT).show();
            }
        });

        placeholder.setOnClickListener(new View.OnClickListener() {
            @Override
            public void onClick(View view) {
                Picasso.
                        with(getApplicationContext())

                        .load("http://i.imgur.com/Dvpvkl.png")

                        .placeholder(R.drawable.defaultimage) // can also be a drawable

                        .into(iv);
                Toast.makeText(MainActivity.this, "Placeholder called ", Toast.LENGTH_SHORT).show();

            }
        });

        fade.setOnClickListener(new View.OnClickListener() {
            @Override
            public void onClick(View view) {
                Picasso
                        .with(getApplicationContext())
                        .load("http://i.imgur.com/DvpvklR.png")
                        .placeholder(R.mipmap.ic_launcher) // can also be a drawable
                        .noFade()
                        .into(iv);
                Toast.makeText(MainActivity.this, "Fade called ", Toast.LENGTH_SHORT).show();
            }
        });
        error.setOnClickListener(new View.OnClickListener() {
            @Override
            public void onClick(View view) {
                Picasso.
                        with(getApplicationContext())
                        .load("http://i.imgur.com/Dvpvkl.png")
                        .error(R.mipmap.ic_launcher) // will be displayed if the image cannot be loaded
                        .into(iv);

                Toast.makeText(MainActivity.this, "Error called ", Toast.LENGTH_SHORT).show();


            }
        });
        callback.setOnClickListener(new View.OnClickListener() {
            @Override
            public void onClick(View view) {
                 callback();

            }
        });
        rotate.setOnClickListener(new View.OnClickListener() {
            @Override
            public void onClick(View view) {

                Picasso.with(getApplicationContext())

                        .load("http://i.imgur.com/DvpvklR.png")

                        .rotate(90f)
                       // .rotate(45f, 220f,100f)

                        .into(iv);
                Toast.makeText(MainActivity.this, "Rotate Called", Toast.LENGTH_SHORT).show();


            }
        });

        complexrotate.setOnClickListener(new View.OnClickListener() {
            @Override
            public void onClick(View view) {

                Picasso.with(getApplicationContext())

                        .load("http://i.imgur.com/DvpvklR.png")

                        //.rotate(90f)
                        .rotate(45f, 220f,100f)

                        .into(iv);
                Toast.makeText(MainActivity.this, "Complex Rotate Called", Toast.LENGTH_SHORT).show();


            }
        });


    }


    public void callback() {
        Picasso.with(MainActivity.this)
                .load("http://i.imgur.com/DvpvklR.png")
                .into(iv, new com.squareup.picasso.Callback() {
                    @Override
                    public void onSuccess() {
                        //do smth when picture is loaded successfully
                        Toast.makeText(MainActivity.this, "Image is loaded succesfully", Toast.LENGTH_SHORT).show();


                    }

                    @Override
                    public void onError() {
                        //do smth when there is picture loading error
                        Toast.makeText(MainActivity.this, "some Error occured", Toast.LENGTH_SHORT).show();

                    }


                });

    }
}
Output:
Now run the App and you will see an image loaded using Picasso library in your Android App. Here play with buttons and check the image in different styles.
Leave a Reply
Premium Project Source Code:
- Food Ordering Android App Project Source Code
- Ecommerce Store Android App Project Source Code
- Convert Website Into Android App Project Source Code
- Quiz Game Android App Project Source Code
- Radio Streaming Android App Source Code
- City Guide Android App Project Source Code
- QR Barcode Android App Project Source Code