CountDownTimer Tutorial With Example In Android Studio
CountDownTimer in Android is used to set a countdown based on interval set by you and it will stop when the time has come in future. You can use this Count Down Timer for creating any countdown for event.
CountDownTimer Basic Code:
CountDownTimer (long millisecInFuture,
                long countDownInterval)
Here millisecInFuture is the time you set in millisecond when you want CountDownTimer to stop and countDownInterval is the interval time in millisecond you set after which number will increment in CountDownTimer.
Table Of Contents
Methods of CountDownTimer in Android:
Let’s discuss some common methods of a CountDownTimer, which are used to configure a CountDownTimer in our application.
1. onTick(long millisUntilFinished )
It callback fired on regular interval and millisUntilFinished is the number of millis in the future from the call until the countdown is done.
2. onFinish()
It fires then the countdown timer finishes i.e time is up. User can add toast to show that time is up or can set text in textView.
public  void onFinish()
{
    textView.setText("FINISH!!");
}
3. start()
It simply starts the countdown timer.
4. cancel()
It cancels the countdown timer.
CountDownTimer Example in Android Studio:
Example: In the below example of countdown timer we will show you the use of countdown timer in our application. For that we display a textview and a button in our xml file. In java class we used the countdown timer methods and add message when timer is over. Here we had set the time and till that specified time the timer will run and then stop. Below is the final output, download project code and step by step explanation:
Step 1: Create a new project and name it CountDownTimer
Step 2: Open res -> layout -> activity_main.xml (or) main.xml and add following code:
In this step we open an xml file and add a button and textview, on clicking button we will call the countdown timer to run and textview will display the time.
<?xml version="1.0" encoding="utf-8"?>
<RelativeLayout xmlns:android="http://schemas.android.com/apk/res/android"
    xmlns:tools="http://schemas.android.com/tools"
    android:id="@+id/activity_main"
    android:layout_width="match_parent"
    android:layout_height="match_parent"
    android:paddingBottom="@dimen/activity_vertical_margin"
    android:paddingLeft="@dimen/activity_horizontal_margin"
    android:paddingRight="@dimen/activity_horizontal_margin"
    android:paddingTop="@dimen/activity_vertical_margin"
    tools:context="com.example.countdowntimer.MainActivity">

    <Button
        android:text="@string/start_timer"
        android:layout_width="wrap_content"
        android:layout_height="wrap_content"
        android:layout_alignParentBottom="true"
        android:layout_centerHorizontal="true"
        android:layout_marginBottom="158dp"
        android:id="@+id/button"
        android:textAppearance="?android:attr/textAppearanceLarge"
        android:textStyle="bold|italic" />

    <TextView
        android:layout_width="wrap_content"
        android:layout_height="wrap_content"
        android:layout_above="@+id/button"
        android:layout_centerHorizontal="true"
        android:layout_marginBottom="63dp"
        android:id="@+id/textView"
        android:textAppearance="?android:attr/textAppearanceLarge"
        android:textSize="40sp" />

</RelativeLayout>
Step 3: Open app -> package -> MainActivity.java
In this step we open MainActivity where we add the code to initiate the countdown timer and a text view to display time and then user can display the message that time is over by using a Toast and also displayed in the textview.
package com.example.countdowntimer;

import android.os.CountDownTimer;
import android.support.v7.app.AppCompatActivity;
import android.os.Bundle;
import android.view.View;
import android.widget.Button;
import android.widget.TextView;

public class MainActivity extends AppCompatActivity  {
    public int counter;
    Button button;
    TextView textView;

    @Override
    protected void onCreate(Bundle savedInstanceState) {
        super.onCreate(savedInstanceState);
        setContentView(R.layout.activity_main);
        button= (Button) findViewById(R.id.button);
        textView= (TextView) findViewById(R.id.textView);
        button.setOnClickListener(new View.OnClickListener()
        {
            @Override
            public void onClick(View v) {
                new CountDownTimer(30000, 1000){
                    public void onTick(long millisUntilFinished){
                        textView.setText(String.valueOf(counter));
                        counter++;
                    }
                    public  void onFinish(){
                       textView.setText("FINISH!!");
                    }
                }.start();
            }
        });
    }
}
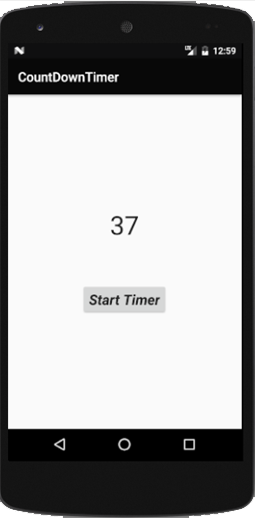
Output:
Now run the App in AVD and you will see that on clicking the button will start the timer till the defined time.
Bonus Tip: You can also run the countdown in decreasing order. For that you just need to set the end value in a variable(counter) and then set it as counter. It will start the countdown from end value.
Recommended Read – How To Create CountDown Timer App In Android Studio: Step By Step Guide
3 thoughts on “CountDownTimer Tutorial With Example In Android Studio”
Leave a Reply
Premium Project Source Code:
- Food Ordering Android App Project Source Code
- Ecommerce Store Android App Project Source Code
- Convert Website Into Android App Project Source Code
- Quiz Game Android App Project Source Code
- Radio Streaming Android App Source Code
- City Guide Android App Project Source Code
- QR Barcode Android App Project Source Code
Awesome tutorials sir
I like your tutorials rest of all..
REal helpful tutorial.. One quick suggestion. Make website more user friendly. p
Hi, I am doing a simple program and I am struggling in countDownTimer cancel() method. The countDownTimer does not stop when I’m calling cancel() method. Is there any problem that I should look at again to fix it? Thank you.