AnalogClock, DigitalClock And TextClock In Android With Example
In Android, AnalogClock is a two handed clock one for hour indicator and the other for minute indicator and DigitalClock & TextClock both looks like your normal digital watch on hand which displays the hours minutes and seconds in digital format. You can simply use these two widgets in your application but these components cannot be used to change the time so for that you may use TimePicker component.
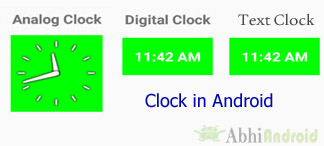
Table Of Contents
Types Of Clock in Android
Analog Clock:
Analog clock is a widget used to display a two handed clock in which one for hour indicator and other one is for minute indicator.
Analog clock code in XML:
<AnalogClock
android:id="@+id/simpleAnalogClock"
android:layout_width="wrap_content"
android:layout_height="wrap_content" />

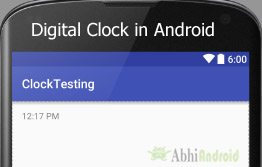
Digital clock is a widget used to display the hours minutes and seconds in digital format.
Digital clock code in XML:
<DigitalClock
    android:id="@+id/simpleDigitalClock"
    android:layout_width="wrap_content"
    android:layout_height="wrap_content" />
Important Note: Digital clock is deprecated in version “ API 17 “ . From API level 17 you can use TextClock instead of digital clock. Below is the description of Text clock in android.
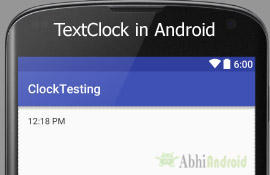
Text Clock is a widget same as Digital Clock but as in API level 17 digital clock is deprecated so we have to use text clock instead of digital clock. If we use text clock in our app then it require minimum API level 17.
Text clock code in XML:
<TextClock
android:id="@+id/simpleTextClock"
android:layout_width="wrap_content"
android:layout_height="wrap_content" />
Attributes of AnalogClock
Now let’s we describe some common and important attributes that helps us to configure analog, text or digital clock in xml file (layout).
1. id: id is an attribute used to uniquely a analog or digital clock. Below is an example code with explanation included, in which we set the id of a analog clock.
<AnalogClock
android:id="@+id/simpleAnalogClock"
android:layout_width="wrap_content"
android:layout_height="wrap_content" /> <!--  id attribute of a analog clock used to uniquely identify it -->
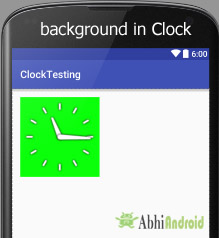
2. background: background attribute is used to set the background of a analog, digital or text clock. You can set a color or a drawable in the background. The background color can also be set in java class using setBackgroundColor() method.
In below code we use background attribute to set the Green color for the background of a analog clock.
<AnalogClock
android:id="@+id/simpleAnalogClock"
android:layout_width="wrap_content"
android:layout_height="wrap_content"
android:background="#0f0"/>
<!-- set green color for the background of analog clock -->
AnalogClock simpleAnalogClock = (AnalogClock)findViewById(R.id.simpleAnalogClock); // inititate a analog clock
simpleAnalogClock.setBackgroundColor(Color.GREEN); // green color for the background of the analog clock
Attributes of DigitalClock Or TextClock
Now let’s we discuss some attributes of digital clock or text clock and they are not used for analog clock:
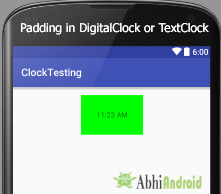
1. padding: padding is an attribute used to set the padding from left, right, top or bottom side of the digitalclock.
Important Note: Padding attribute has no effect on analog clock.
- paddingRight: padding right attribute is used to set the padding from the right side of the digital clock.
- paddingLeft: padding left attribute is used to set set the padding from the left side of the digital clock.
- paddingTop: padding top attribute is used to set the padding from the top side of the digital clock.
- paddingBottom: padding bottom attribute is used to set the padding from the bottom side of the digital clock.
- Padding: padding attribute is used to set the padding from the all side’s of the digital clock .
Below we set the 30dp padding from all the sides of the digital clock.
<DigitalClock
    android:id="@+id/simpleDigitalClock"
    android:layout_width="wrap_content"
    android:layout_height="wrap_content"
    android:layout_centerHorizontal="true"
    android:background="#0f0"
    android:padding="30dp"/><!-- set  30dp padding from all the sides of the digital clock -->
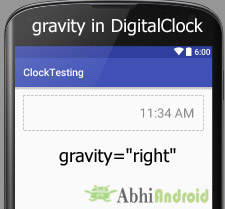
Below we set the right gravity for text of a digital clock.
<DigitalClock
android:id="@+id/simpleDigitalClock"
android:layout_width="fill_parent"
android:layout_height="wrap_content"
android:layout_centerHorizontal="true"
android:textSize="25sp"
android:padding="20dp"
android:gravity="right"/> <!--  set right gravity for the text of the digital clock -->
Below we set the red color for the displayed text of a digital clock.
<DigitalClock
android:id="@+id/simpleDigitalClock"
android:layout_width="wrap_content"
android:layout_height="wrap_content"
android:layout_centerHorizontal="true"
android:textSize="25sp"
android:padding="20dp"
android:textColor="#f00"/> <!--  red color for the displayed text -->

DigitalClock simpleDigitalClock = (DigitalClock)findViewById(R.id.simpleDigitalClock); // initiate a digital clock
simpleDigitalClock.setTextColor(Color.RED); // red text color for displayed text
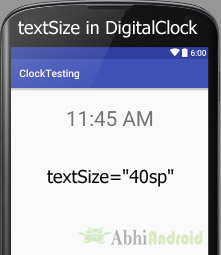
4. textSize: textSize attribute is used to set the size of text of a digital clock. We can set the text size in sp(scale independent pixel) or dp(density pixel).
Below we set the 40sp size for the text of a digital clock.
<DigitalClock
android:id="@+id/simpleDigitalClock"
android:layout_width="wrap_content"
android:layout_height="wrap_content"
android:layout_centerHorizontal="true"
android:padding="20dp"
android:textSize="40sp" /> <!--  set 40sp for the displayed text size -->
DigitalClock simpleDigitalClock = (DigitalClock)findViewById(R.id.simpleDigitalClock); // initiate a digital clock
simpleDigitalClock.setTextSize(25); // set size for displayed text
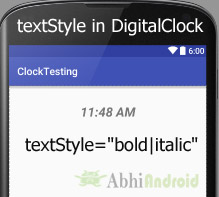
5. textStyle: textStyle attribute is used to set the text style of a digital clock. You can set bold, italic and normal. If we need to use two or more styles for a digital clock then “|” operator is used for that.
Below we set the bold and italic text styles for text of a digital clock.
<DigitalClock
android:id="@+id/simpleDigitalClock"
android:layout_width="wrap_content"
android:layout_height="wrap_content"
android:layout_centerHorizontal="true"
android:padding="20dp"
android:textSize="25sp"
android:textStyle="bold|italic" /> <!--  set bold and italic text style for the displayed text -->
Example of Analog and Digital Clock:
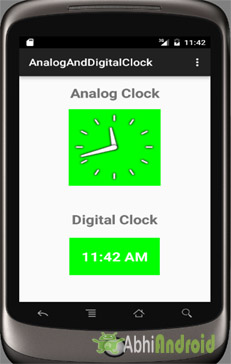
Below is the example of Analog and Digital Clock in Android in which we display a simple analog and digital clock by using their different properties and perform click event on them so whenever a user click on a clock the name of the clock is displayed by using a Toast. Below is the final output, download code and step by step tutorial:
Step 2: Open res -> layout -> activity_main.xml (or) main.xml and add following code:
In this step we open an xml file and add the code for displaying two clocks and two text view for displaying name of the clock.
<RelativeLayout xmlns:android="http://schemas.android.com/apk/res/android"
    xmlns:tools="http://schemas.android.com/tools"
    android:layout_width="match_parent"
    android:layout_height="match_parent"
    android:paddingBottom="@dimen/activity_vertical_margin"
    android:paddingLeft="@dimen/activity_horizontal_margin"
    android:paddingRight="@dimen/activity_horizontal_margin"
    android:paddingTop="@dimen/activity_vertical_margin"
    tools:context=".MainActivity">

    <TextView
        android:id="@+id/textView1"
        android:layout_width="wrap_content"
        android:layout_height="wrap_content"
        android:layout_centerHorizontal="true"
        android:text="@string/analogClock"
        android:textSize="25sp"
        android:textStyle="bold" />

    <AnalogClock
        android:id="@+id/simpleAnalogClock"
        android:layout_width="wrap_content"
        android:layout_height="wrap_content"
        android:layout_centerHorizontal="true"
        android:layout_marginTop="50dp"
        android:background="#0f0"
        android:padding="50dp" />

    <TextView
        android:id="@+id/textView2"
        android:layout_width="wrap_content"
        android:layout_height="wrap_content"
        android:layout_below="@+id/simpleAnalogClock"
        android:layout_centerHorizontal="true"
        android:layout_marginTop="50dp"
        android:text="@string/digitalClock"
        android:textSize="25sp"
        android:textStyle="bold" />

    <DigitalClock
        android:id="@+id/simpleDigitalClock"
        android:layout_width="wrap_content"
        android:layout_height="wrap_content"
        android:layout_below="@+id/textView2"
        android:layout_centerHorizontal="true"
        android:layout_marginTop="20dp"
        android:background="#0f0"
        android:padding="20dp"
        android:textColor="#fff"
        android:textSize="25sp"
        android:textStyle="bold" />

</RelativeLayout>
Step 3: Open src -> package -> MainActivity.java
In this step we open MainActivity where we add the code to initiate the digital and analog clock and then perform click event on them, so whenever a user click on a clock the name of the clock is displayed by using a Toast.
package example.abhiandroid.analoganddigitalclock;

import android.graphics.Color;
import android.support.v7.app.AppCompatActivity;
import android.os.Bundle;
import android.view.Menu;
import android.view.MenuItem;
import android.view.View;
import android.widget.AnalogClock;
import android.widget.DigitalClock;
import android.widget.Toast;

public class MainActivity extends AppCompatActivity {

    @Override
    protected void onCreate(Bundle savedInstanceState) {
        super.onCreate(savedInstanceState);
        setContentView(R.layout.activity_main);
        // inititate the digital and analog clock
        DigitalClock simpleDigitalClock = (DigitalClock) findViewById(R.id.simpleDigitalClock);
        AnalogClock simpleAnalogClock = (AnalogClock) findViewById(R.id.simpleAnalogClock);
        // perform click event on analog clock
        simpleAnalogClock.setOnClickListener(new View.OnClickListener() {
            @Override
            public void onClick(View v) {
                Toast.makeText(MainActivity.this, "Analog Clock", Toast.LENGTH_SHORT).show(); // display a toast for analog clock
            }
        });
        // perform click event on digital clock
        simpleDigitalClock.setOnClickListener(new View.OnClickListener() {
            @Override
            public void onClick(View v) {
                Toast.makeText(MainActivity.this, "Digital Clock", Toast.LENGTH_SHORT).show(); //display a toast for digital clock
            }
        });
    }


}
Step 4: Open res -> values -> strings.xml
In this step we open string file which is used to store string data of the app. In this example we store two strings one for analog clock and other for digital clock.
<resources>
<string name="app_name">AnalogAndDigitalClock</string>
<string name="hello_world">Hello world!</string>
<string name="action_settings">Settings</string>
<string name="analogClock">Analog Clock</string>
<string name="digitalClock" >Digital Clock</string>
</resources>
Output:
Now run the App in AVD and you will see time shown in Analog Clock and Digital Clock.
Important Note: Text Clock example will be similar to digital clock. As we already discussed earlier in this article for API level 17 or higher you will need to use TextClock instead of DigitalClock in Android.

6 thoughts on “AnalogClock, DigitalClock And TextClock In Android With Example”
Leave a Reply to saurav Cancel reply
Premium Project Source Code:
- Food Ordering Android App Project Source Code
- Ecommerce Store Android App Project Source Code
- Convert Website Into Android App Project Source Code
- Quiz Game Android App Project Source Code
- Radio Streaming Android App Source Code
- City Guide Android App Project Source Code
- QR Barcode Android App Project Source Code
How to add seconds and if sometime I want to use hours only?
Thank you for a really good example.
I live in Sweden and the Clock works but
shows two hours minus. How can I get
right timszone (now it is summertime)
Normal GMT +1.
how to add second hand in this analog clock??
good
Thx for your effort .
nice