Here in this example of Linear Layout inside ScrollView we create a custom layout for user registration form using different views(TextView, EditText etc). After creating different views we enclose them inside Linear Layout and then we enclose the whole layout in ScrollView to make all the element or views scrollable. In this registration form we display different fields with one Button named “Submit” to submit the data of the user. Whenever a user clicks on Submit Button, we check all the fields are filled or not if filled we display a Successful message by using a Toast.
Below you can download code, see final output and step by step explanation of example:
Need Of ScrollView:
When we have complex layout with more views(Buttons, TextViews or any other view) then we must enclose them inside another standard layout like Table Layout, Relative Layout or Linear Layout. We can specify layout_width and layout_height to adjust the width and height of screen. We can specify height and width in dp(density pixel) or px(pixel). After enclosing those views in a standard layout, enclose the whole layout in ScrollView to make all the element or views scrollable.
Important Note: In android default ScrollView is used to scroll the items in vertical direction and if we want to scroll the items horizontally then we need to implement horizontal ScrollView. One more important thing is that we never use a Scroll View with a ListView because List View is default scrollable(i.e. vertical scrollable).
Step 1: Create a new project and name it LinearLayoutInsideScrollView.
Step 2: Open res -> layout ->activity_main.xml (or) main.xml and add following code:
In this step we open xml file and then create custom layout for user registration form using different views(TextView, EditText or any other view). After creating different views we enclose them inside Linear Layout and then we enclose the whole layout in ScrollView to make all the element or views scrollable. In this registration form we display different fields with one Button named “Submit” to submit the data of the user.
<LinearLayout xmlns:android="http://schemas.android.com/apk/res/android"
xmlns:tools="http://schemas.android.com/tools"
android:layout_width="match_parent"
android:layout_height="match_parent"
android:background="@color/whiteColor"
android:orientation="vertical"
android:paddingBottom="@dimen/activity_vertical_margin"
android:paddingLeft="@dimen/activity_horizontal_margin"
android:paddingRight="@dimen/activity_horizontal_margin"
android:paddingTop="@dimen/activity_vertical_margin"
tools:context=".MainActivity">
<!-- vertical ScrollView to make all the items or views scrollable -->
<ScrollView
android:layout_width="match_parent"
android:layout_height="match_parent"
android:scrollbars="none">
<!-- LinearLayout Inside ScrollView -->
<LinearLayout
android:layout_width="match_parent"
android:layout_height="match_parent"
android:orientation="vertical">

<!-- create a Linear Layout with horizontal orientation and weightSum property -->

<LinearLayout
android:id="@+id/firstLayout"
android:layout_width="match_parent"
android:layout_height="wrap_content"
android:layout_marginTop="20dp"
android:orientation="horizontal"
android:weightSum="2">

<!-- place one TextView and one EditText inside layout using weight property -->

<TextView
android:layout_width="0dp"
android:layout_height="50dp"
android:layout_marginRight="10dp"
android:layout_weight="0.6"
android:gravity="center_vertical"
android:paddingLeft="10dp"
android:text="First Name"
android:textColor="@color/blackColor" />

<EditText
android:id="@+id/firstName"
android:layout_width="0dp"
android:layout_height="50dp"
android:layout_marginLeft="10dp"
android:layout_weight="1.4"
android:background="@color/editTextBack"
android:hint="First Name"
android:imeOptions="actionNext"
android:paddingLeft="10dp"
android:singleLine="true"
android:textColor="@color/blackColor" />
</LinearLayout>
<!-- create a Linear Layout with horizontal orientation and weightSum property -->

<LinearLayout
android:id="@+id/secondLayout"
android:layout_width="match_parent"
android:layout_height="wrap_content"
android:layout_marginTop="20dp"
android:orientation="horizontal"
android:weightSum="2">

<!-- place one TextView and one EditText inside layout using weight property -->

<TextView
android:layout_width="0dp"
android:layout_height="50dp"
android:layout_marginRight="10dp"
android:layout_weight="0.6"
android:gravity="center_vertical"
android:paddingLeft="10dp"
android:text="Last Name"
android:textColor="@color/blackColor" />

<EditText
android:id="@+id/lastName"
android:layout_width="0dp"
android:layout_height="50dp"
android:layout_marginLeft="10dp"
android:layout_weight="1.4"
android:background="@color/editTextBack"
android:hint="Last Name"
android:imeOptions="actionNext"
android:paddingLeft="10dp"
android:singleLine="true"
android:textColor="@color/blackColor" />
</LinearLayout>
<!-- create a Linear Layout with horizontal orientation and weightSum property -->

<LinearLayout
android:id="@+id/thirdLayout"
android:layout_width="match_parent"
android:layout_height="wrap_content"
android:layout_marginTop="20dp"
android:orientation="horizontal"
android:weightSum="2">

<!-- place one TextView and one EditText inside layout using weight property -->

<TextView
android:layout_width="0dp"
android:layout_height="50dp"
android:layout_marginRight="10dp"
android:layout_weight="0.6"
android:gravity="center_vertical"
android:paddingLeft="10dp"
android:text="Address"
android:textColor="@color/blackColor" />

<EditText
android:id="@+id/address"
android:layout_width="0dp"
android:layout_height="50dp"
android:layout_marginLeft="10dp"
android:layout_weight="1.4"
android:background="@color/editTextBack"
android:hint="Address"
android:imeOptions="actionNext"
android:paddingLeft="10dp"
android:singleLine="true"
android:textColor="@color/blackColor" />
</LinearLayout>
<!-- create a Linear Layout with horizontal orientation and weightSum property -->

<LinearLayout
android:id="@+id/fourthLayout"
android:layout_width="match_parent"
android:layout_height="wrap_content"
android:layout_marginTop="20dp"
android:orientation="horizontal"
android:weightSum="2">

<!-- place one TextView and one EditText inside layout using weight property -->

<TextView
android:layout_width="0dp"
android:layout_height="50dp"
android:layout_marginRight="10dp"
android:layout_weight="0.6"
android:gravity="center_vertical"
android:paddingLeft="10dp"
android:text="City"
android:textColor="@color/blackColor" />

<EditText
android:id="@+id/city"
android:layout_width="0dp"
android:layout_height="50dp"
android:layout_marginLeft="10dp"
android:layout_weight="1.4"
android:background="@color/editTextBack"
android:hint="City"
android:imeOptions="actionNext"
android:paddingLeft="10dp"
android:singleLine="true"
android:textColor="@color/blackColor" />
</LinearLayout>
<!-- create a Linear Layout with horizontal orientation and weightSum property -->

<LinearLayout
android:id="@+id/fifthLayout"
android:layout_width="match_parent"
android:layout_height="wrap_content"
android:layout_marginTop="20dp"
android:orientation="horizontal"
android:weightSum="2">

<!-- place one TextView and one EditText inside layout using weight property -->

<TextView
android:layout_width="0dp"
android:layout_height="50dp"
android:layout_marginRight="10dp"
android:layout_weight="0.6"
android:gravity="center_vertical"
android:paddingLeft="10dp"
android:text="State"
android:textColor="@color/blackColor" />

<EditText
android:id="@+id/state"
android:layout_width="0dp"
android:layout_height="50dp"
android:layout_marginLeft="10dp"
android:layout_weight="1.4"
android:background="@color/editTextBack"
android:hint="State"
android:imeOptions="actionNext"
android:paddingLeft="10dp"
android:singleLine="true"
android:textColor="@color/blackColor" />
</LinearLayout>
<!-- create a Linear Layout with horizontal orientation and weightSum property -->

<LinearLayout
android:id="@+id/sixthLayout"
android:layout_width="match_parent"
android:layout_height="wrap_content"
android:layout_marginTop="20dp"
android:orientation="horizontal"
android:weightSum="2">

<!-- place one TextView and one EditText inside layout using weight property -->

<TextView
android:layout_width="0dp"
android:layout_height="50dp"
android:layout_marginRight="10dp"
android:layout_weight="0.6"
android:gravity="center_vertical"
android:paddingLeft="10dp"
android:text="Country"
android:textColor="@color/blackColor" />

<EditText
android:id="@+id/country"
android:layout_width="0dp"
android:layout_height="50dp"
android:layout_marginLeft="10dp"
android:layout_weight="1.4"
android:background="@color/editTextBack"
android:hint="Country"
android:imeOptions="actionNext"
android:paddingLeft="10dp"
android:singleLine="true"
android:textColor="@color/blackColor" />
</LinearLayout>
<!-- create a Linear Layout with horizontal orientation and weightSum property -->

<LinearLayout
android:id="@+id/seventhLayout"
android:layout_width="match_parent"
android:layout_height="wrap_content"
android:layout_marginTop="20dp"
android:orientation="horizontal"
android:weightSum="2">

<!-- place one TextView and one EditText inside layout using weight property -->

<TextView
android:layout_width="0dp"
android:layout_height="50dp"
android:layout_marginRight="10dp"
android:layout_weight="0.6"
android:gravity="center_vertical"
android:paddingLeft="10dp"
android:text="Pin Code"
android:textColor="@color/blackColor" />

<EditText
android:id="@+id/pinCode"
android:layout_width="0dp"
android:layout_height="50dp"
android:layout_marginLeft="10dp"
android:layout_weight="1.4"
android:background="@color/editTextBack"
android:hint="Pin Code"
android:imeOptions="actionNext"
android:inputType="number"
android:paddingLeft="10dp"
android:singleLine="true"
android:textColor="@color/blackColor" />
</LinearLayout>

<LinearLayout
android:id="@+id/eightLayout"
android:layout_width="match_parent"
android:layout_height="wrap_content"
android:layout_marginTop="20dp"
android:orientation="horizontal"
android:weightSum="2">

<!-- place one TextView and one EditText inside layout using weight property -->

<TextView
android:layout_width="0dp"
android:layout_height="50dp"
android:layout_marginRight="10dp"
android:layout_weight="0.6"
android:gravity="center_vertical"
android:paddingLeft="10dp"
android:text="Mobile Number"
android:textColor="@color/blackColor" />

<EditText
android:id="@+id/mobileNumber"
android:layout_width="0dp"
android:layout_height="50dp"
android:layout_marginLeft="10dp"
android:layout_weight="1.4"
android:background="@color/editTextBack"
android:hint="Mobile Number"
android:imeOptions="actionNext"
android:inputType="number"
android:paddingLeft="10dp"
android:singleLine="true"
android:textColor="@color/blackColor" />
</LinearLayout>

<Button
android:id="@+id/submit"
android:layout_width="fill_parent"
android:layout_height="wrap_content"
android:layout_marginTop="30dp"
android:background="@color/greenColor"
android:text="Submit"
android:textColor="@color/whiteColor" />
</LinearLayout>
</ScrollView>

</LinearLayout>
Step 3:
Open src -> package -> MainActivity.java
In this step Firstly we get the reference of different views(TextView, EditText or any other view) that are used in xml file. After that we perform click event on the Button so Whenever a user clicks on Submit Button, we check all the fields are filled or not if filled we display a Successful message by using a toast else we display an error message at that particular field.
package example.abhiandroid.linearlayoutinsidescrollview;

import android.app.Activity;
import android.os.Bundle;
import android.view.Menu;
import android.view.MenuItem;
import android.view.View;
import android.widget.Button;
import android.widget.EditText;
import android.widget.Toast;

public class MainActivity extends Activity {

Button submitButton;
EditText firstName, lastName, address, city, state, country, pinCode, mobileNumber;

// automatically called when the activity is first created
@Override
protected void onCreate(Bundle savedInstanceState) {
super.onCreate(savedInstanceState);
setContentView(R.layout.activity_main);
// get the reference of EditText's and Button and then perform click event on Button
firstName = (EditText) findViewById(R.id.firstName);
lastName = (EditText) findViewById(R.id.lastName);
address = (EditText) findViewById(R.id.address);
city = (EditText) findViewById(R.id.city);
state = (EditText) findViewById(R.id.state);
country = (EditText) findViewById(R.id.country);
pinCode = (EditText) findViewById(R.id.pinCode);
mobileNumber = (EditText) findViewById(R.id.mobileNumber);
submitButton = (Button) findViewById(R.id.submit);
// perform click event on Button
submitButton.setOnClickListener(new View.OnClickListener() {
@Override
public void onClick(View v) {
if (validate(firstName)&&validate(lastName)&&validate(address)&&validate(city)&&validate(state)&&validate(country)
&&validate(pinCode)&&validate(mobileNumber))
{
// display successful message if all the fields are filled
Toast.makeText(getApplicationContext(),"SuccessFully Register",Toast.LENGTH_LONG).show();
}
}
});
}

private boolean validate(EditText editText) {
// check whether the field is empty or not
if (editText.getText().toString().trim().length() < 1) {
// display the error if field is empty
editText.setError("Please Fill This.!!!");
// set focus on field so that cursor will automatically move to that field
editText.requestFocus();
return false;
}
return true;
}

@Override
public boolean onCreateOptionsMenu(Menu menu) {
// Inflate the menu; this adds items to the action bar if it is present.
getMenuInflater().inflate(R.menu.menu_main, menu);
return true;
}

@Override
public boolean onOptionsItemSelected(MenuItem item) {
// Handle action bar item clicks here. The action bar will
// automatically handle clicks on the Home/Up button, so long
// as you specify a parent activity in AndroidManifest.xml.
int id = item.getItemId();

//noinspection SimplifiableIfStatement


if (id == R.id.action_settings) {
return true;
}

return super.onOptionsItemSelected(item);
}

}
Step 4: Open res -> values-> colors.xml
In this step we define the colors (red, green and white) that used in the background and text color of view’s.
<?xml version="1.0" encoding="utf-8"?>
<resources>
<!-- define colors used in our xml file-->
<color name="whiteColor">#fff</color>
<color name="blackColor">#000</color>
<color name="editTextBack">#f2f2f2</color>
<color name="greenColor">#0f0</color>
</resources>
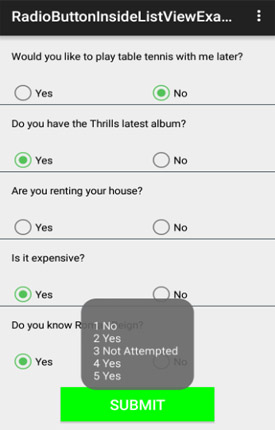
Output:
Now run the App and you will see a form asking generation information which is scrollable.